Students
 Educators
Learning Plans in DMAC and HB4545
Updated 9/20/21
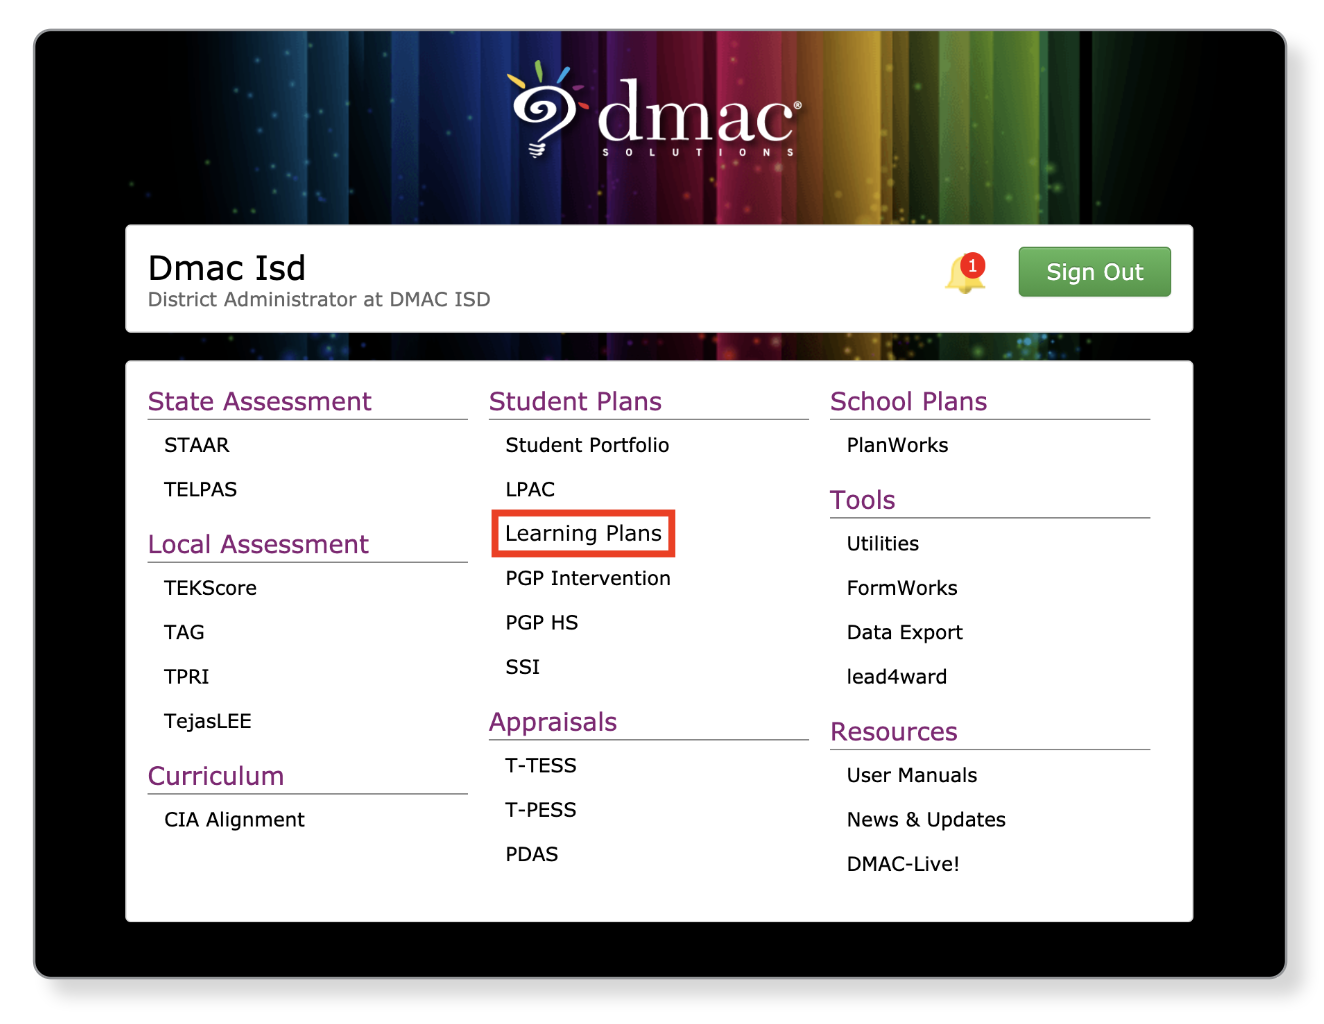
In order to make the documentation process more flexible, we have introduced Learning Plans within DMAC. You will notice that our RtI application is now called Learning Plans.
Create multiple Learning Plans for students either as an Accelerated Learning Plan (ALP) or a Multi-Tiered System of Supports (MTSS) plan.
For those who have utilized RtI in the past, there is no change to the primary functionality of the software. (Learning Plans User Manual). The enhancements to the search screens are listed below.
Recent Updates:
RtI is now called Learning Plans.
Learning Plans is a separate application that schools can purchase and it is integrated within Student Portfolio.
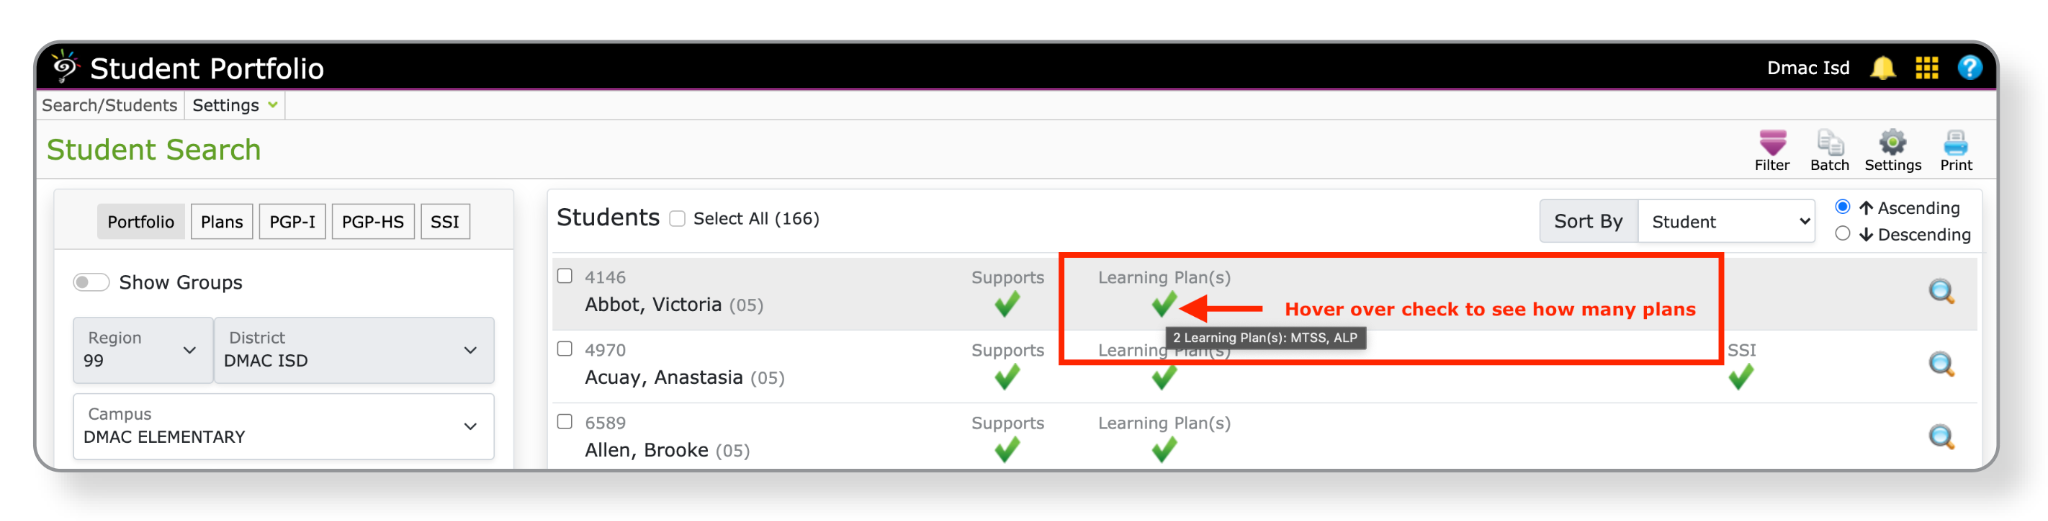
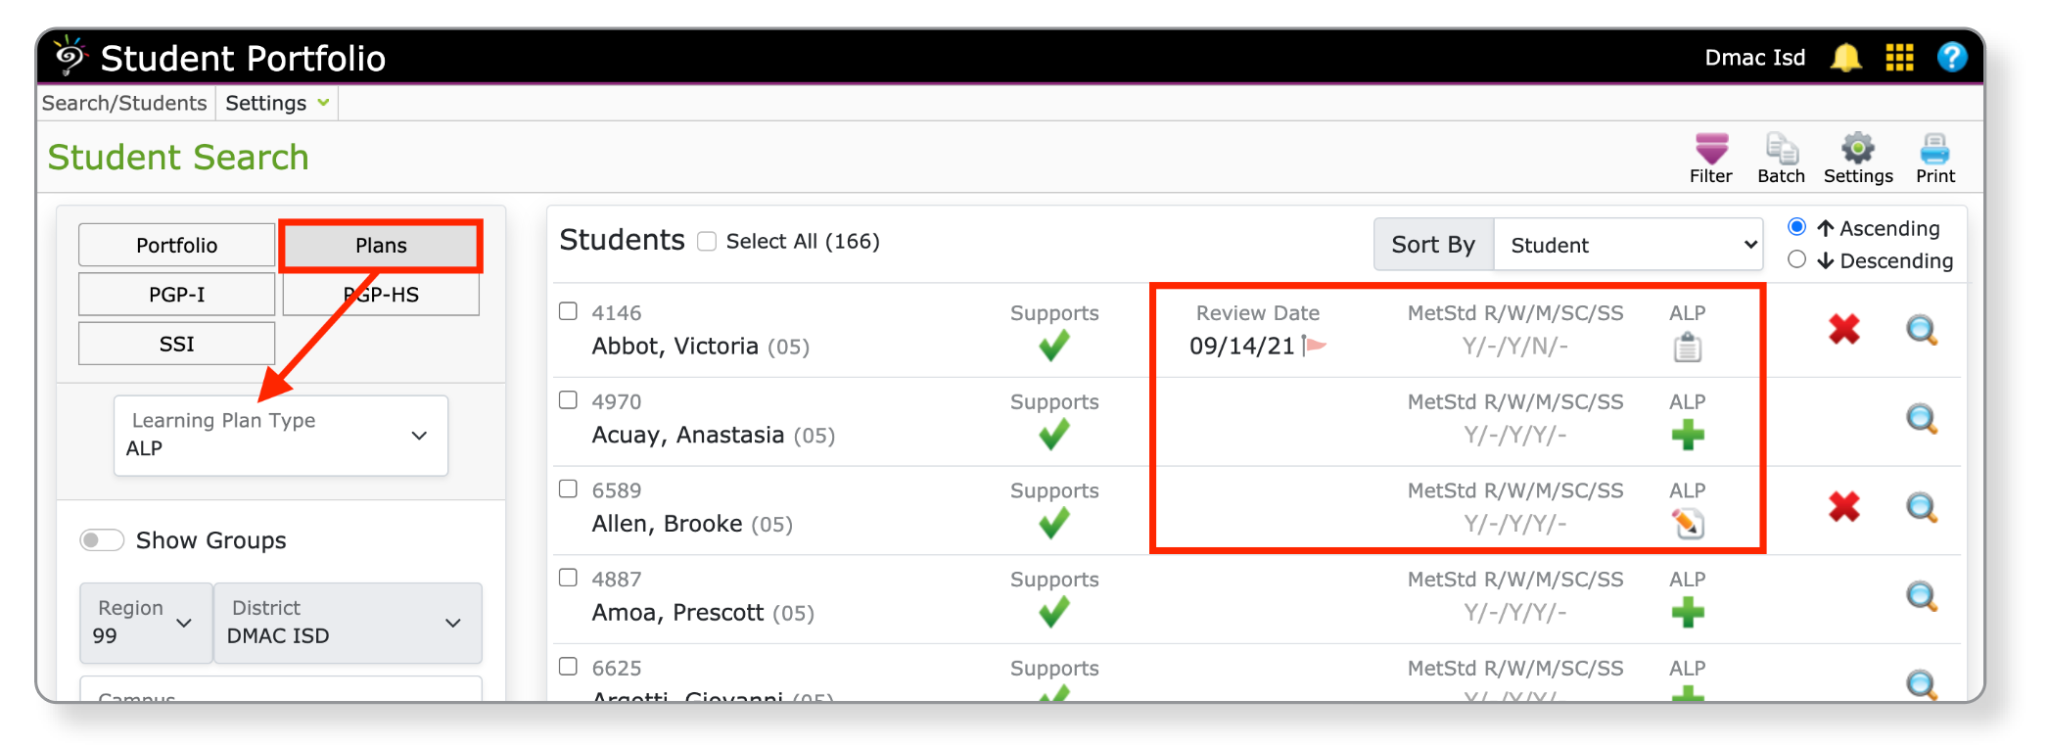
Hover over the Learning Plans check mark from the Student Portfolio search screen to see how many plans a student has.
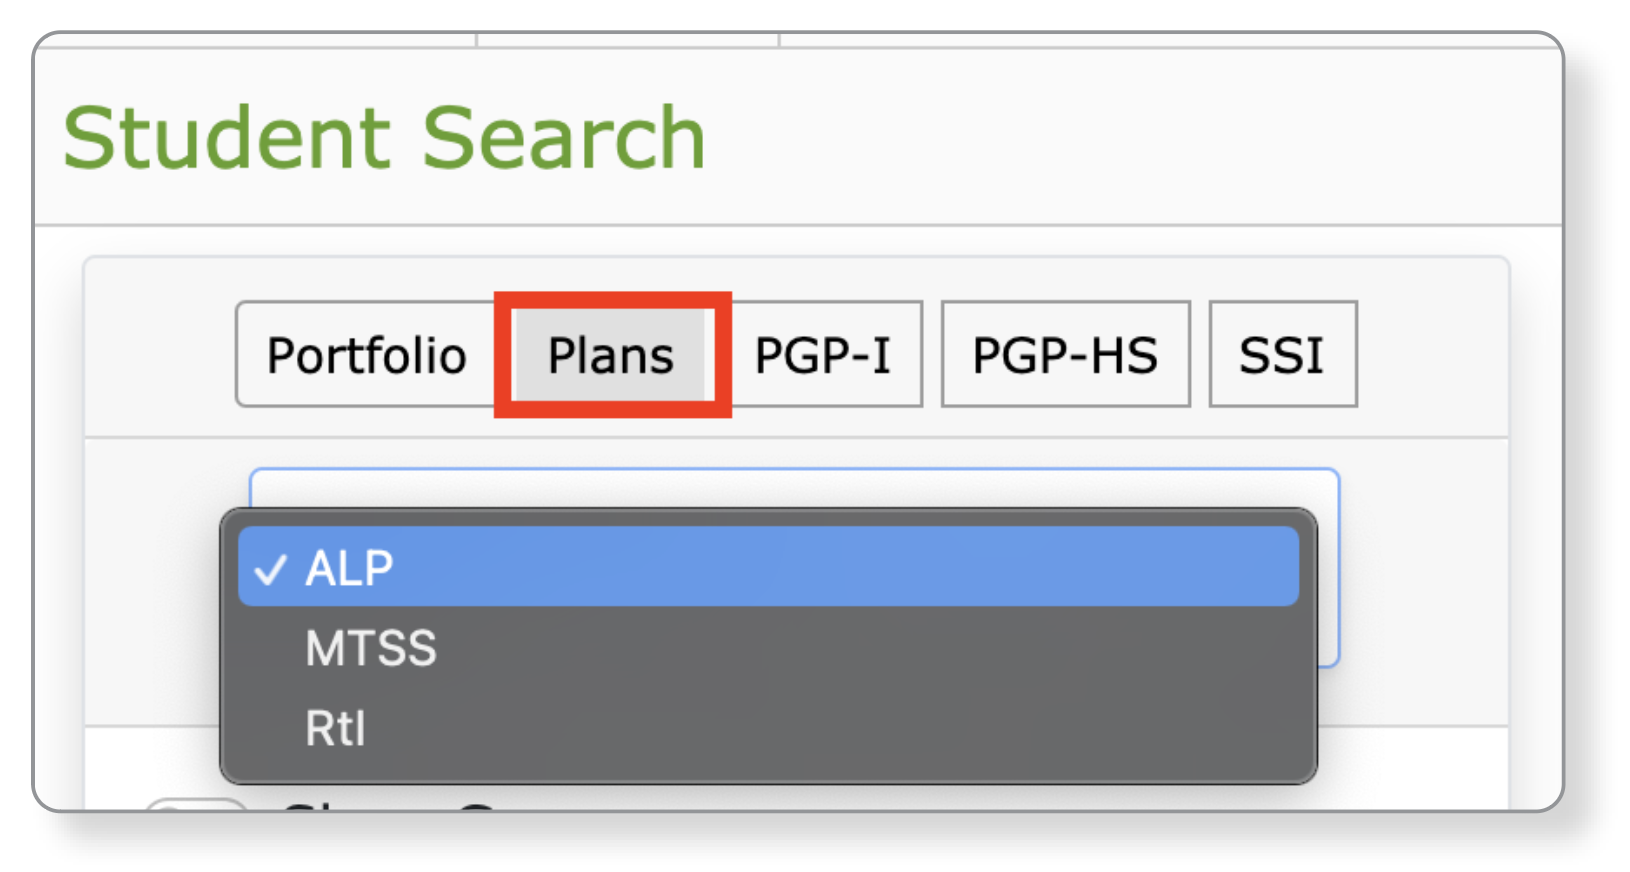
From Student Portfolio, select the Plans tab to search for students. Choose the plan type (ALP, MTSS or RtI) from the drop down menu. Previous year plans are labeled RtI. Plans created this year are labeled MTSS or ALP.
Plan creators and Admin roles can convert previously created plans to an ALP
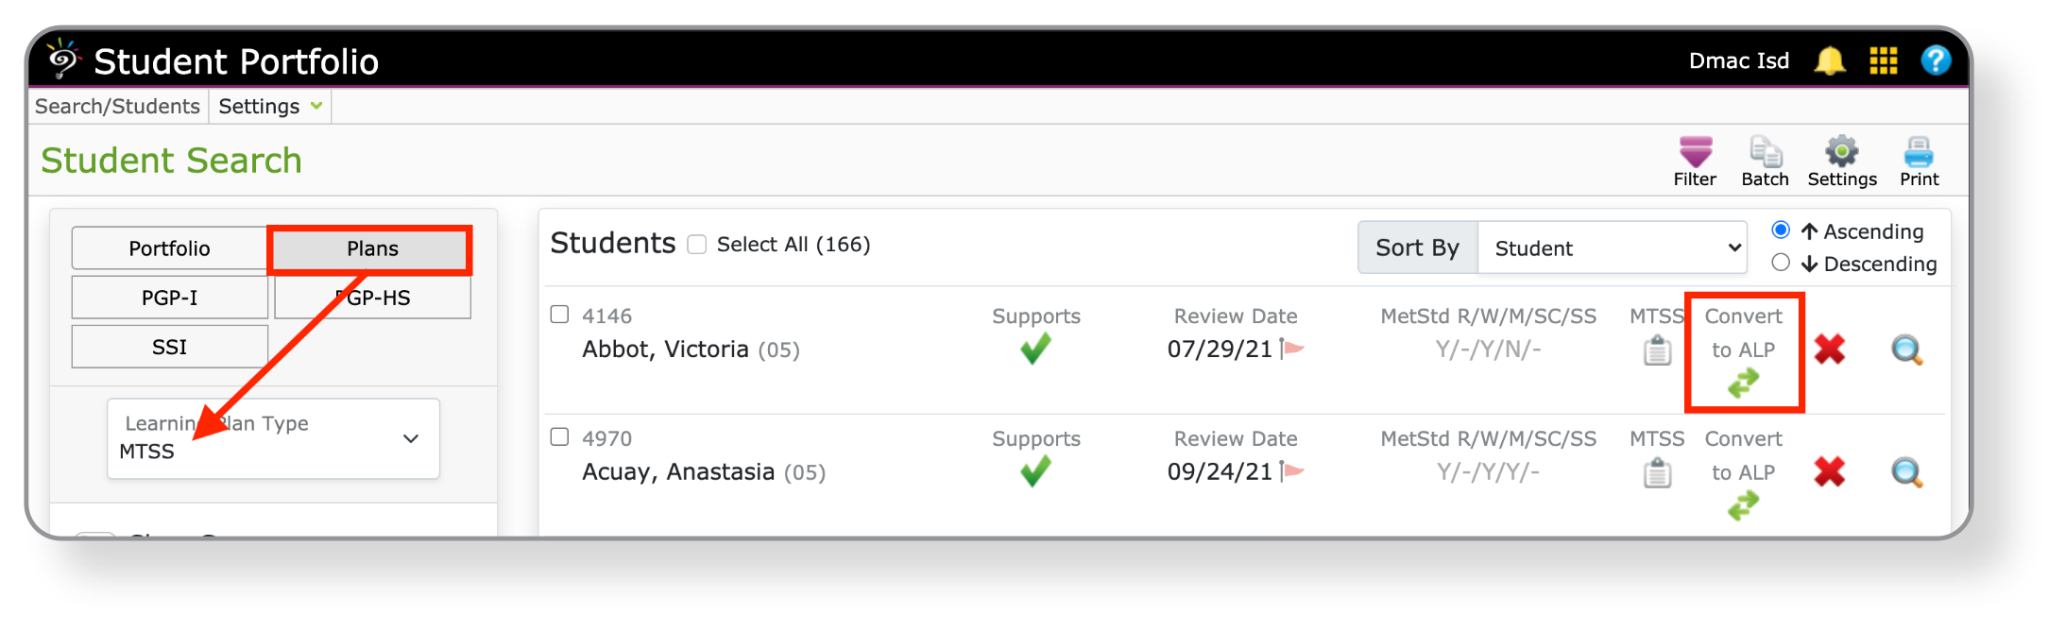
Click the plan icons to start or access an individual plan for a student.
- (Plus sign) Start a new Plan
- (Clipboard) Access either the MTSS or ALP plan pages for an individual student
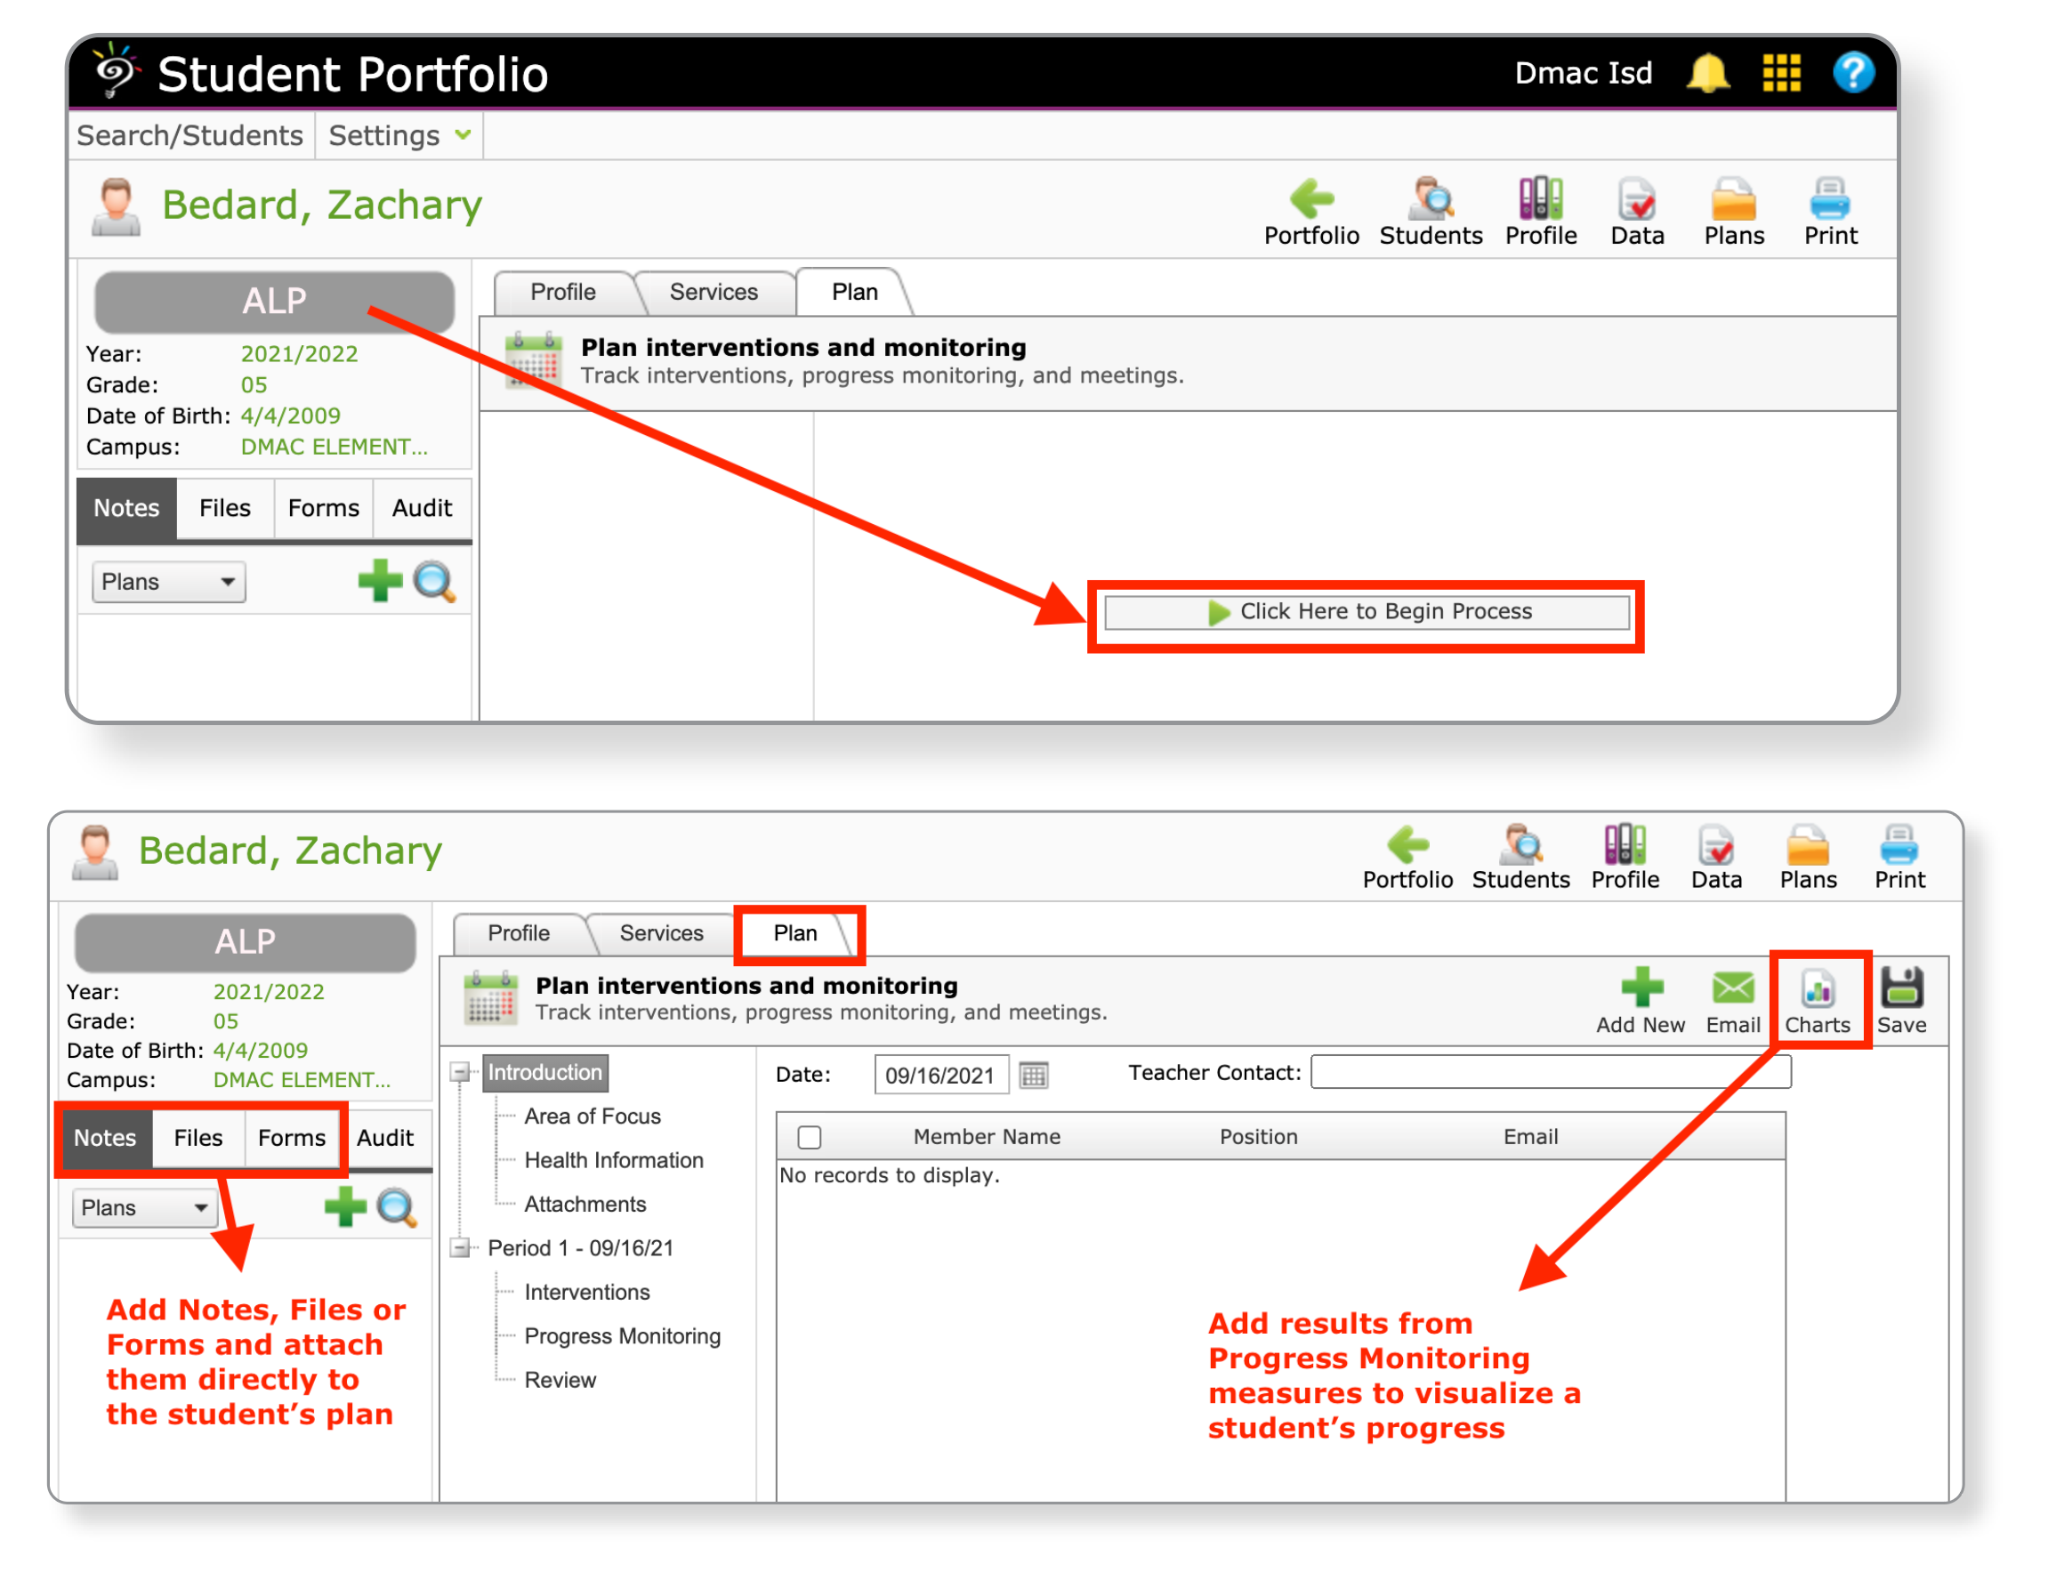
- (Edit icon) Open the plan page. Move to the Plan tab to begin the process of starting an intervention or monitoring period. This icon will display if you previously clicked to start a plan but have not added data.
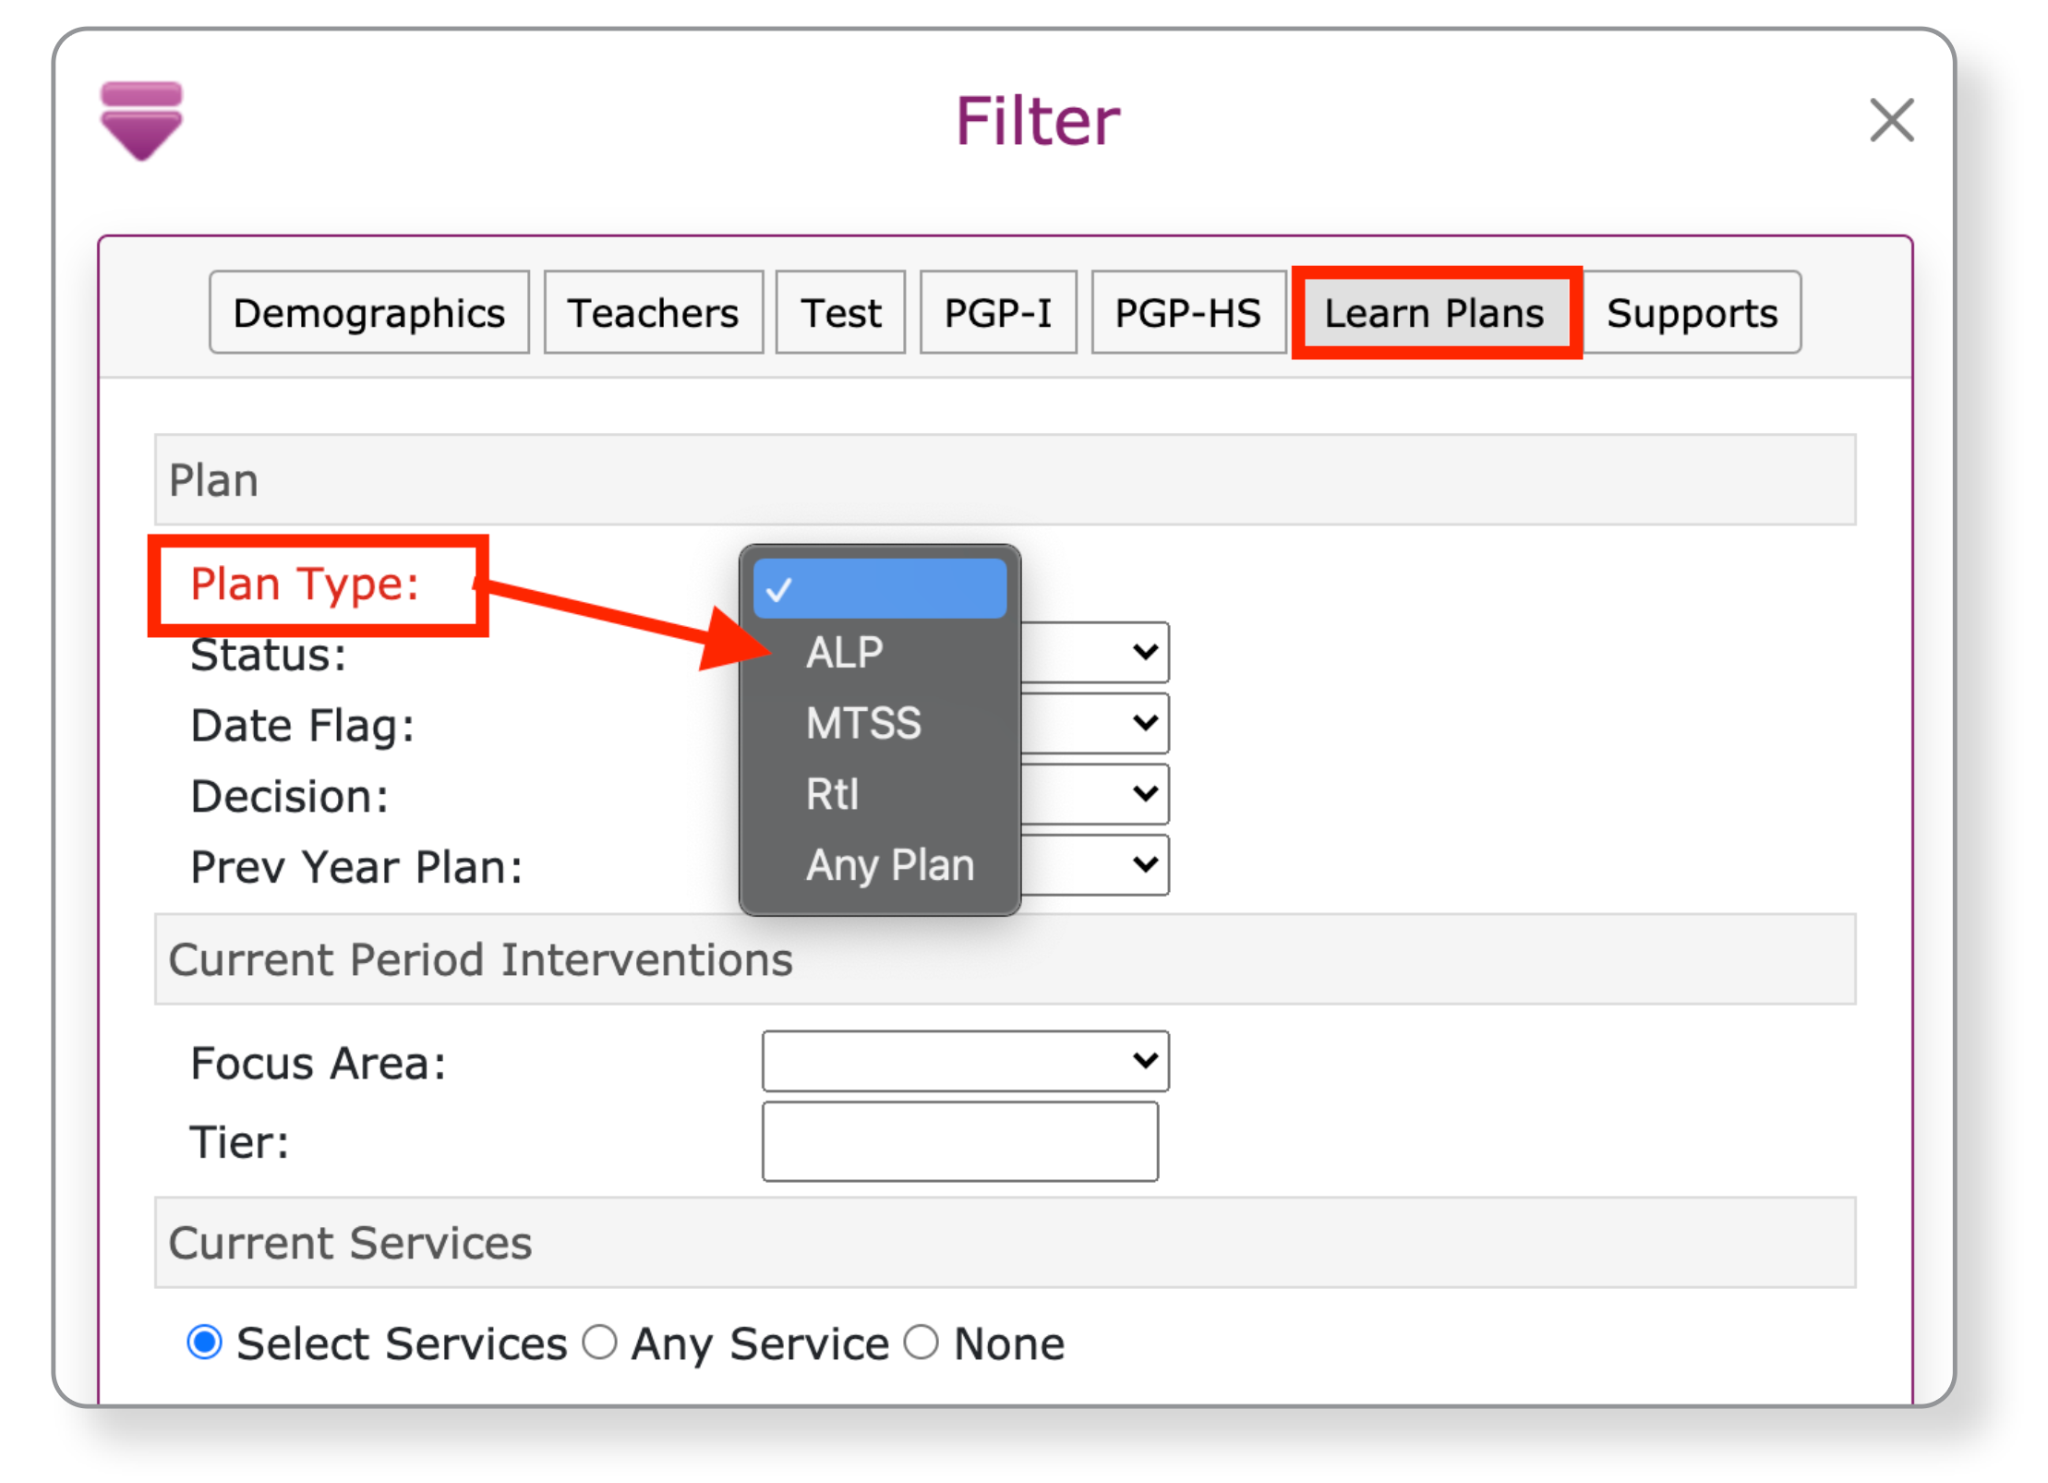
Use the Advanced Filter icon to filter your list of students by plan type.
Utilize the Learning Plans application to create Accelerated Learning Plans for Students
- Learning Plans (previously RtI): Use the application to set up Accelerated Learning Plans for individual students. Assign committee members and document progress on your specific areas of focus for each student.
- In combination with Student Portfolio, this is a powerful tool to create and manage documentation that all key stakeholders involved with a student’s success have access to. And, the records travel with the student from grade to grade and stay with them as they move campuses.
DMAC and HB4545
The introduction of Learning Plans to DMAC is an example of how we are trying to help schools with the documentation associated with HB4545.
Below, we have outlined additional ways that you can use DMAC to identify students needing accelerated instruction and how to document their progress along the way.
Please contact the DMAC Help Desk at 1.866.988.6777 with any questions!
Evaluate STAAR Scores
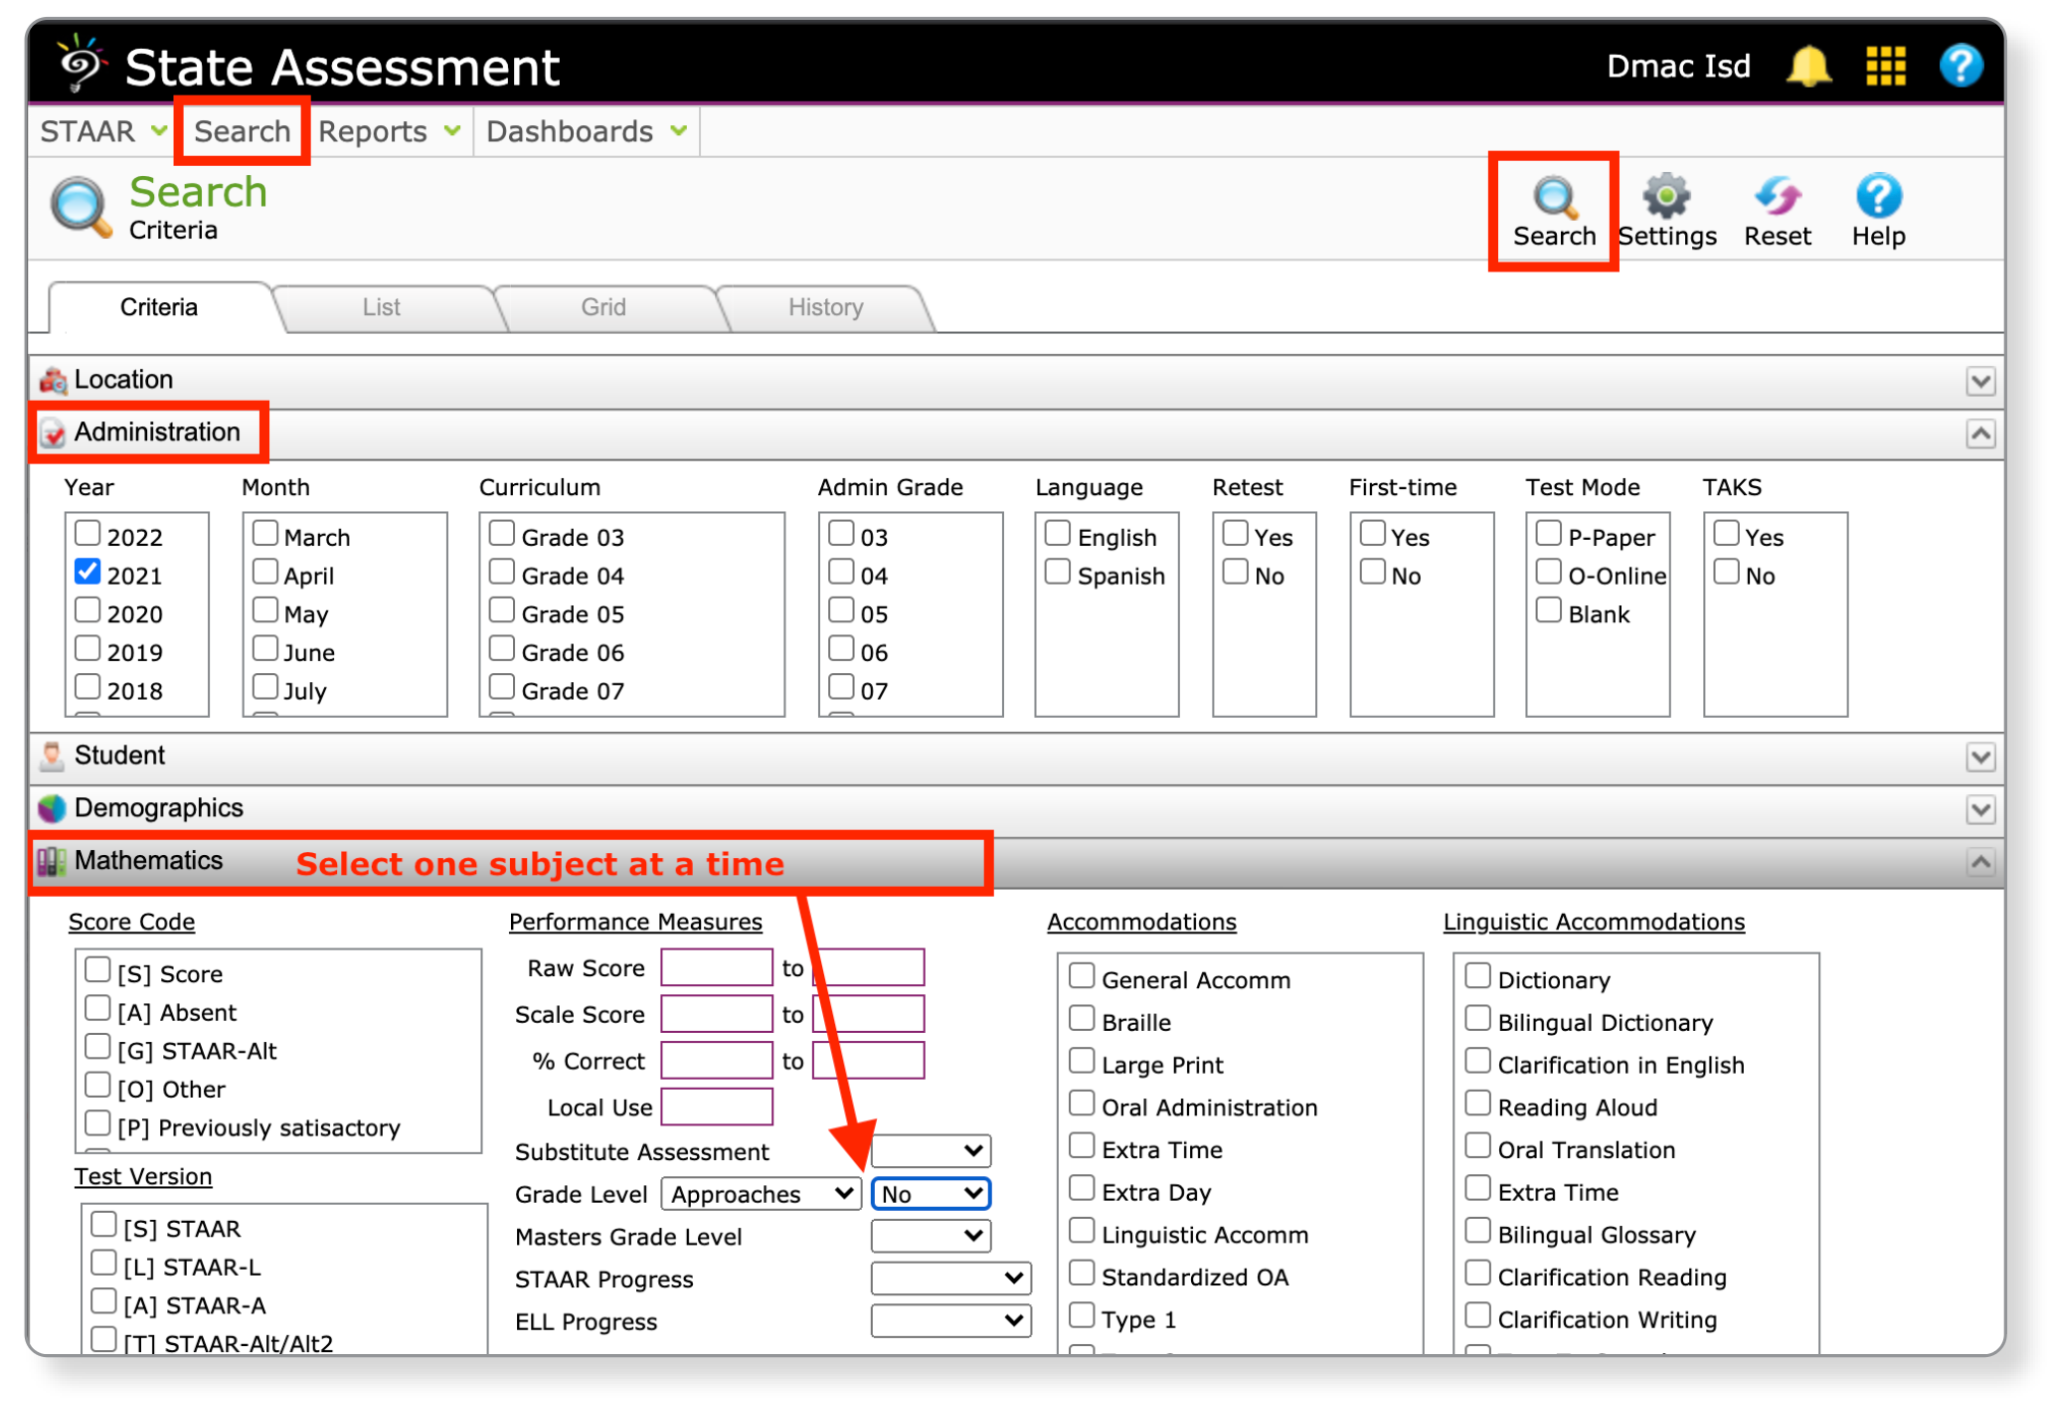
From State Assessment, utilize Search to identify students that Did Not Meet Approaches.
Select Search from the top navigation bar, then select the Year from the Administration section and for one subject at time, select Approaches and No next to Grade Level and then click the Search button on the top right or the bottom of the screen.
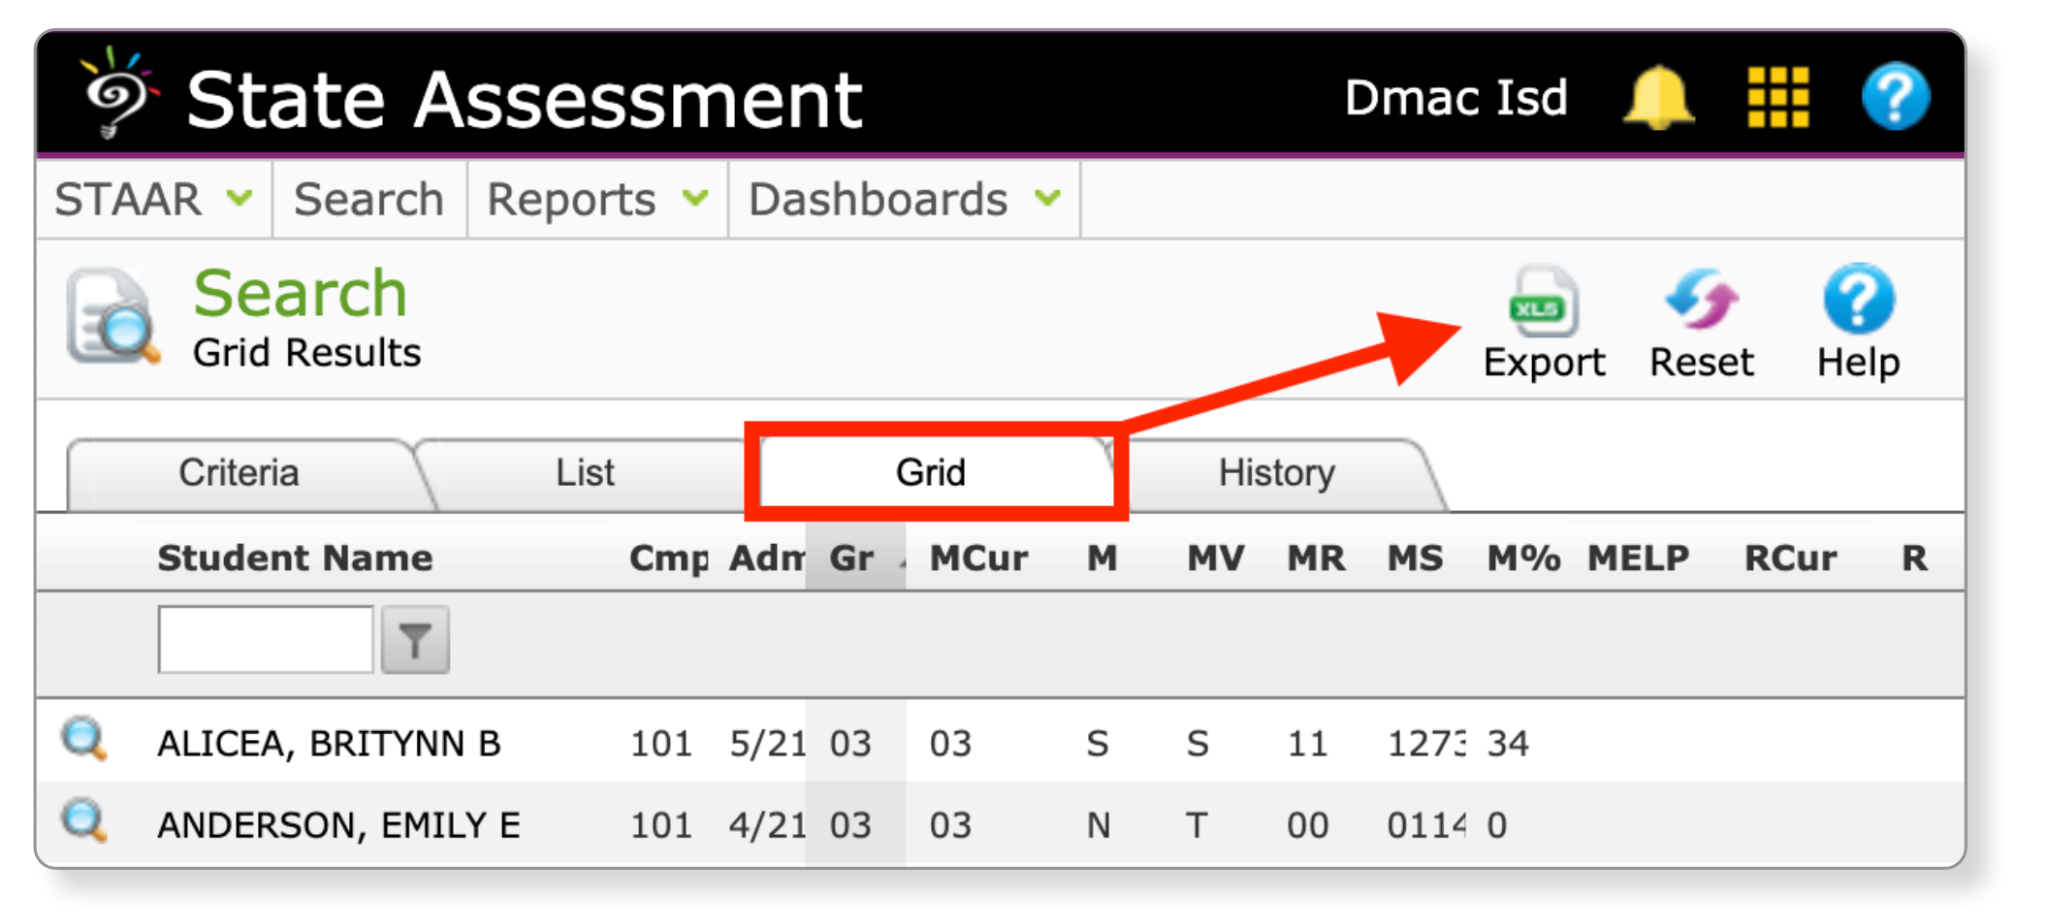
From your Search results, use the Grid tab to export your list of students to Excel.
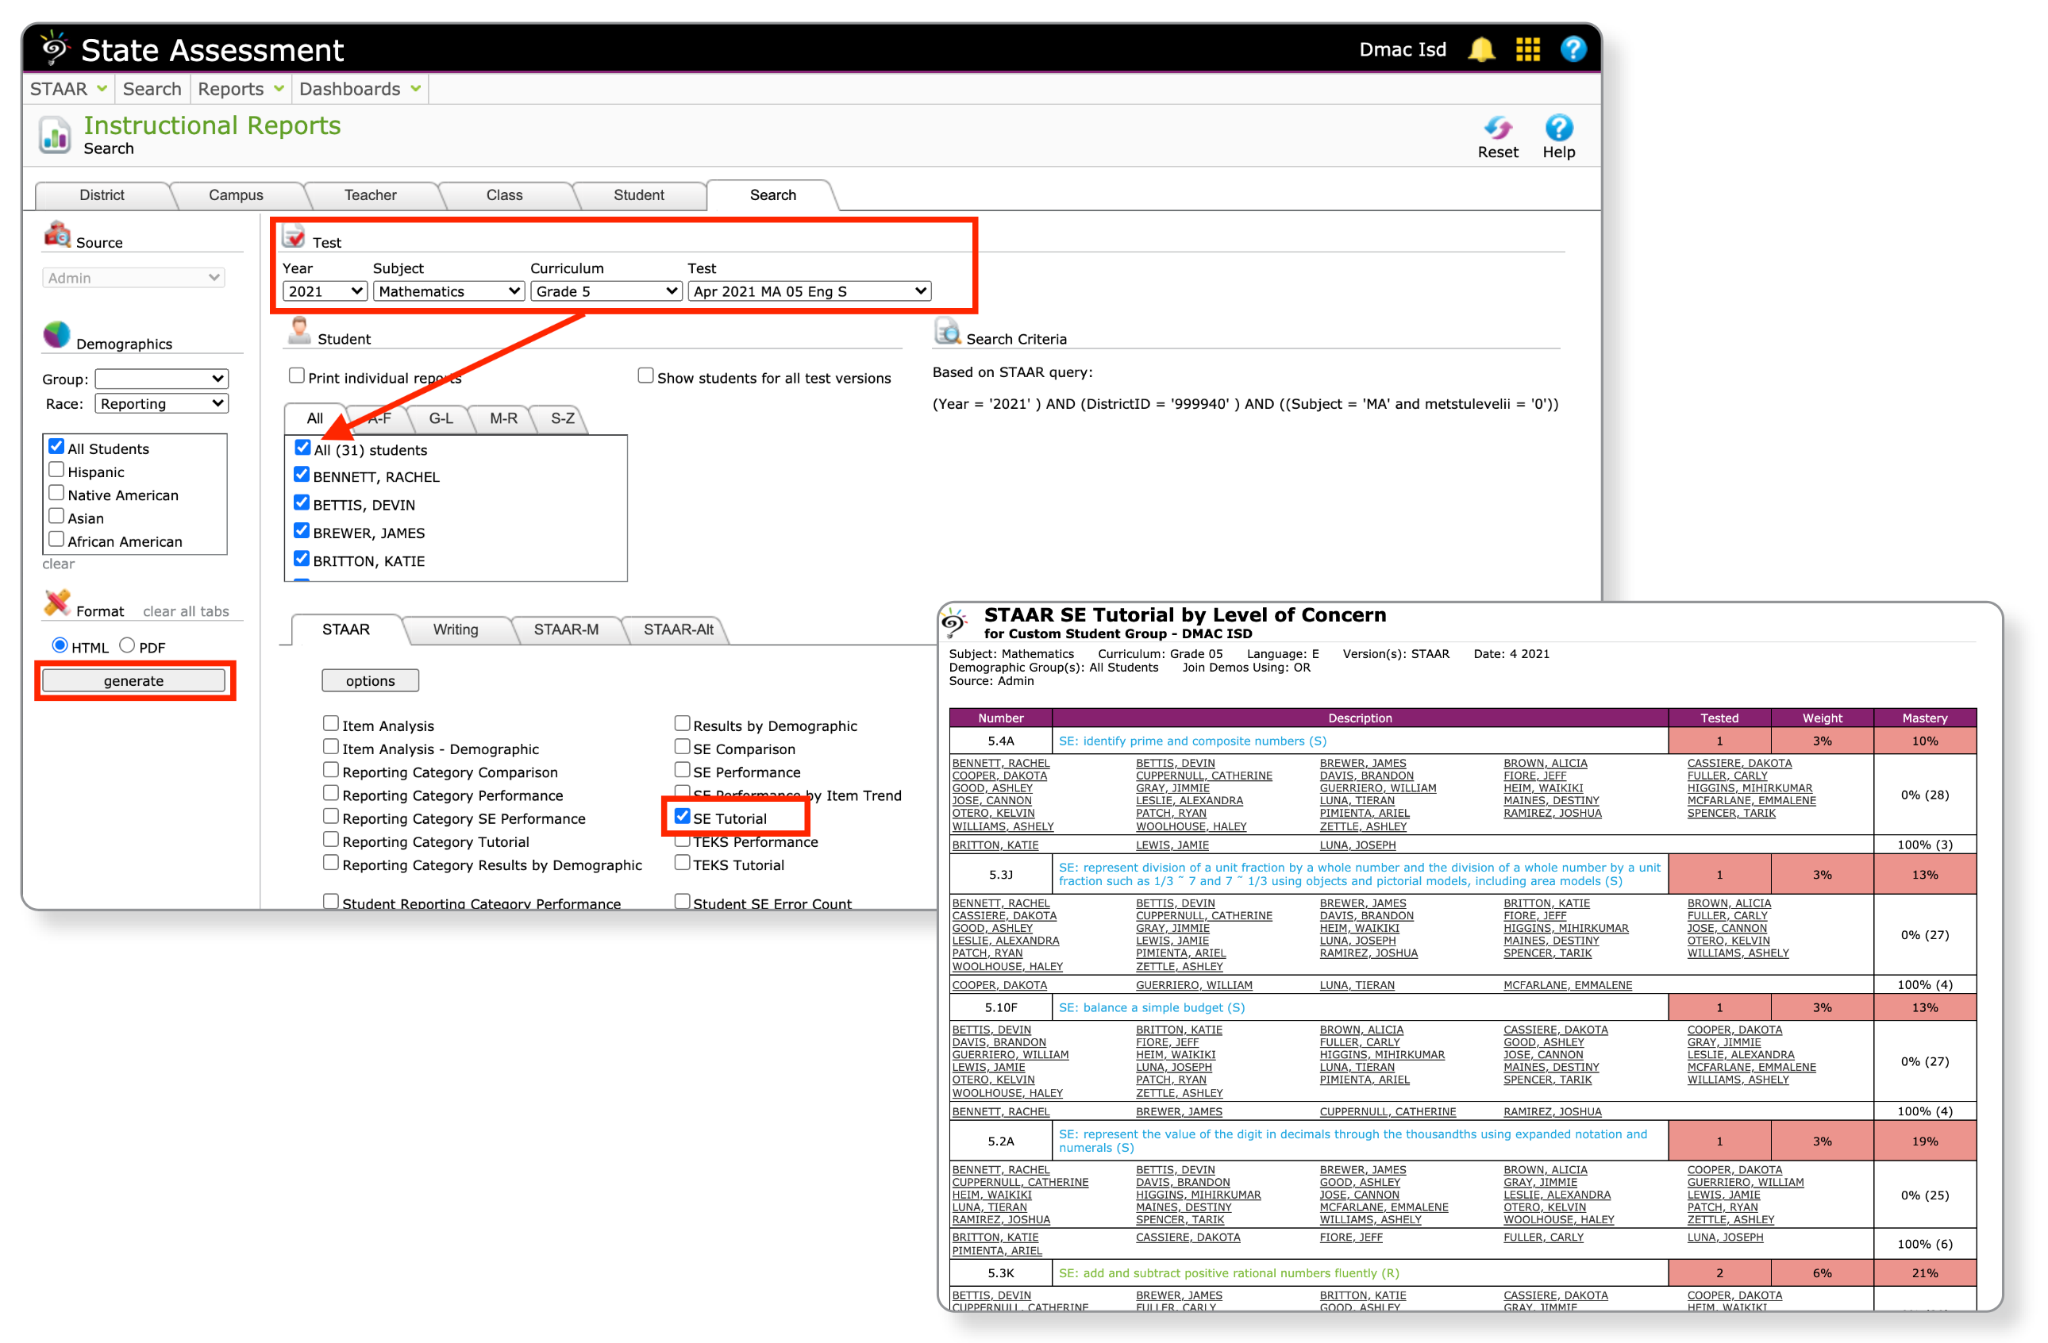
Next, use the Search tab of Instructional reports to create SE Tutorials for those students in each grade/subject area.
The Search tab will automatically load the available students based on your last Search query. You can generate Instructional Reports for the students in your Search results.

Identify students who were not present or didn’t test for STAAR
According to the regulations within HB4545, students are required to receive Accelerated Instruction if they did not test or were absent for the STAAR test. They will need to receive Accelerated Instruction until they can take a similar local assessment aligned to the appropriate standards and pass it.
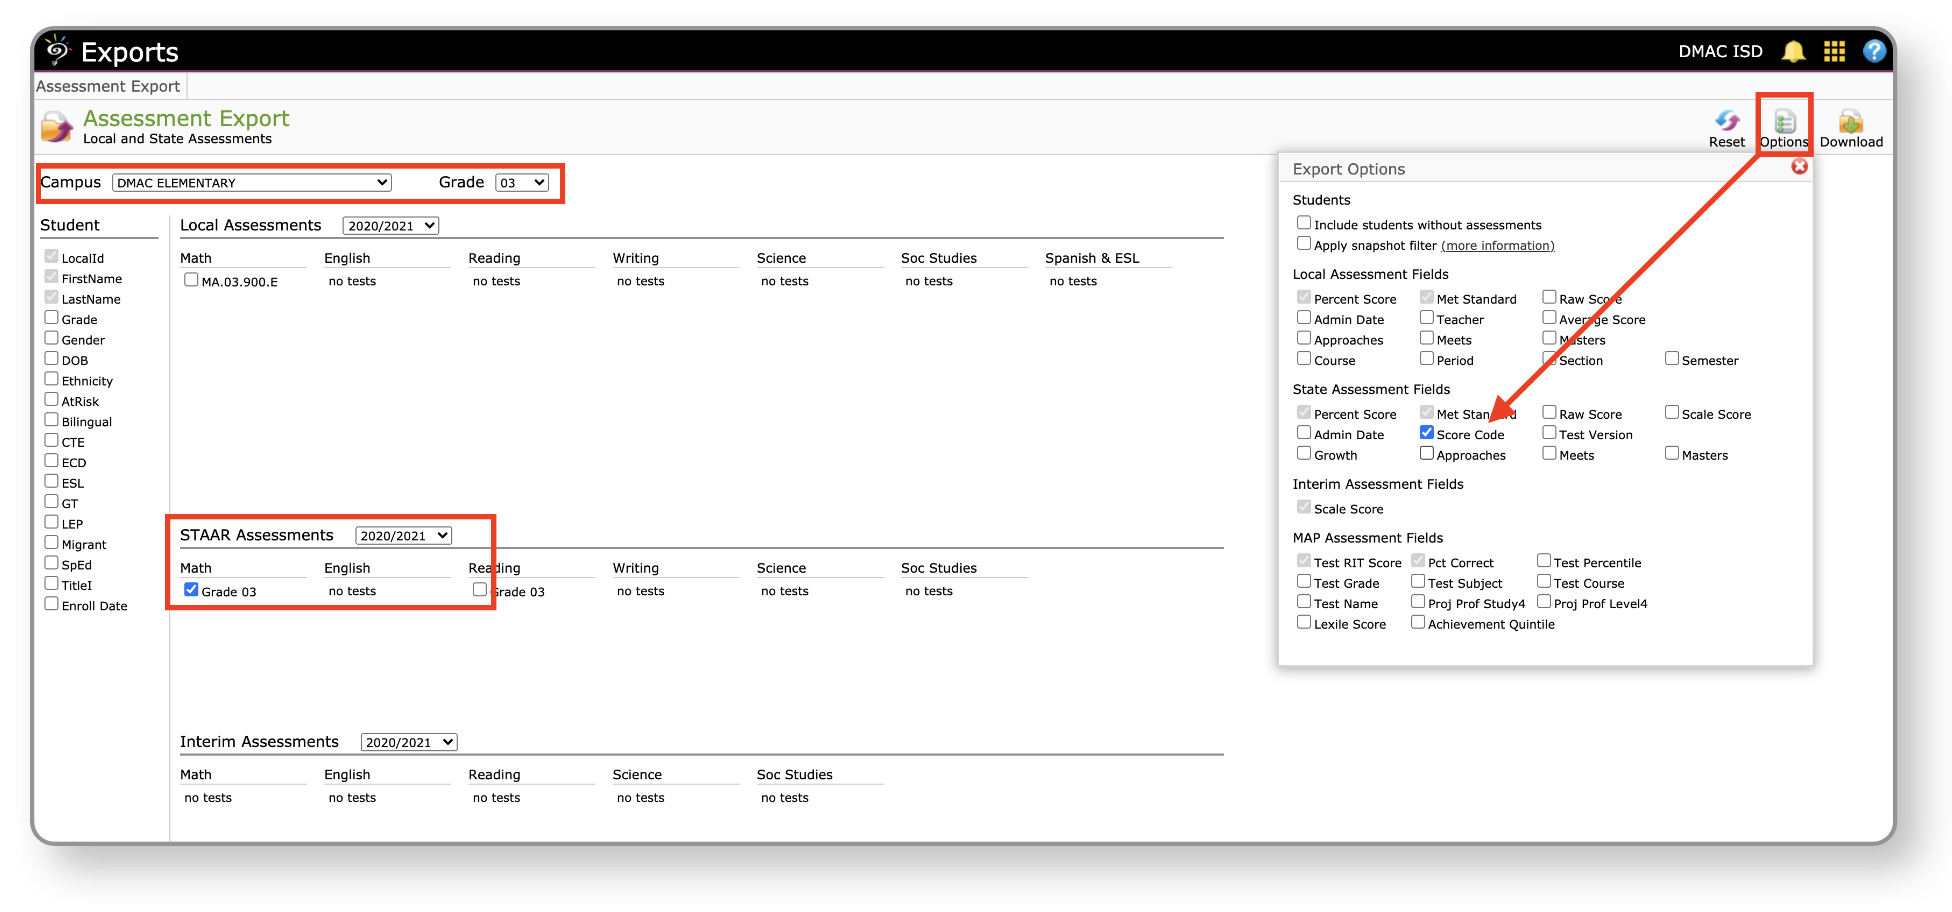
To identify students on your roster that didn’t test, use the Data Export application in DMAC. Data Export is free to all schools who have state and local data in our system.
- From Data Export, generate a list of students who had a score code of A or O.
- Make sure to select Options > and check Score Code.
- Click the Download button once you’ve made your selections to open your list in a spreadsheet.
Create Custom Student Groups
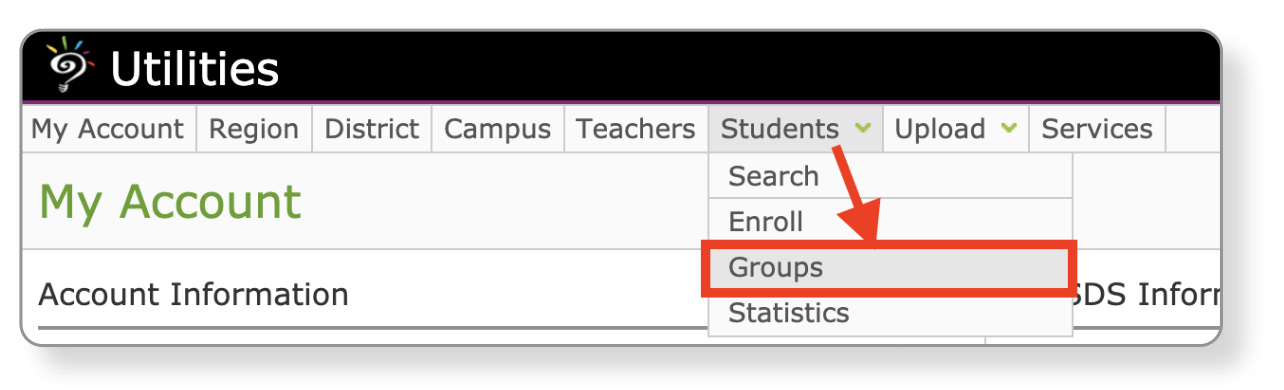
Now that you’ve identified students needing accelerated instruction, you can create custom student groups. This process can be initiated after selecting students from the Search screen in Student Portfolio or by going directly to the Utilities application from Students > Groups.
Findning Groups
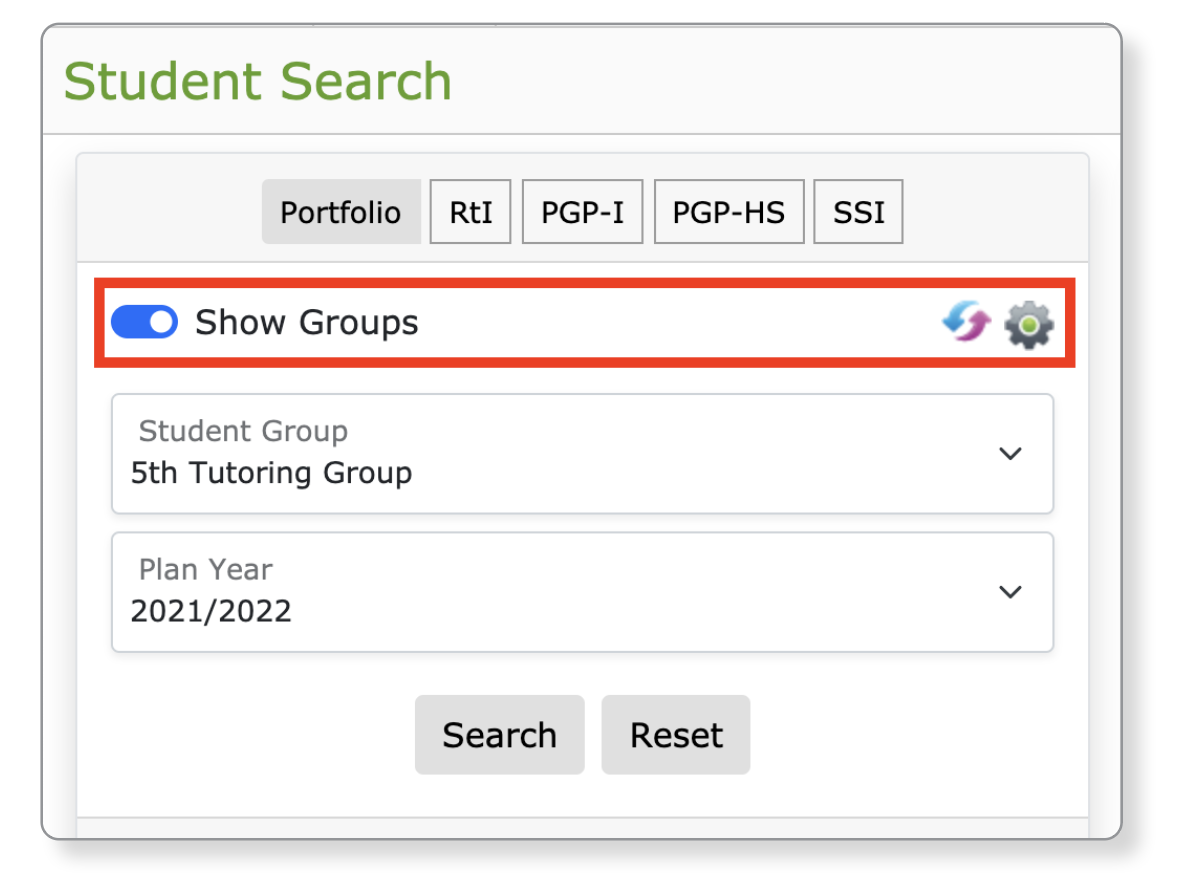
From Student Search in Student Portfolio, click the button to Show Groups. The Refresh icon will bring in recently created groups and the
Settings icon will open the Utilities application where you can make edits to existing groups.
Creating Groups
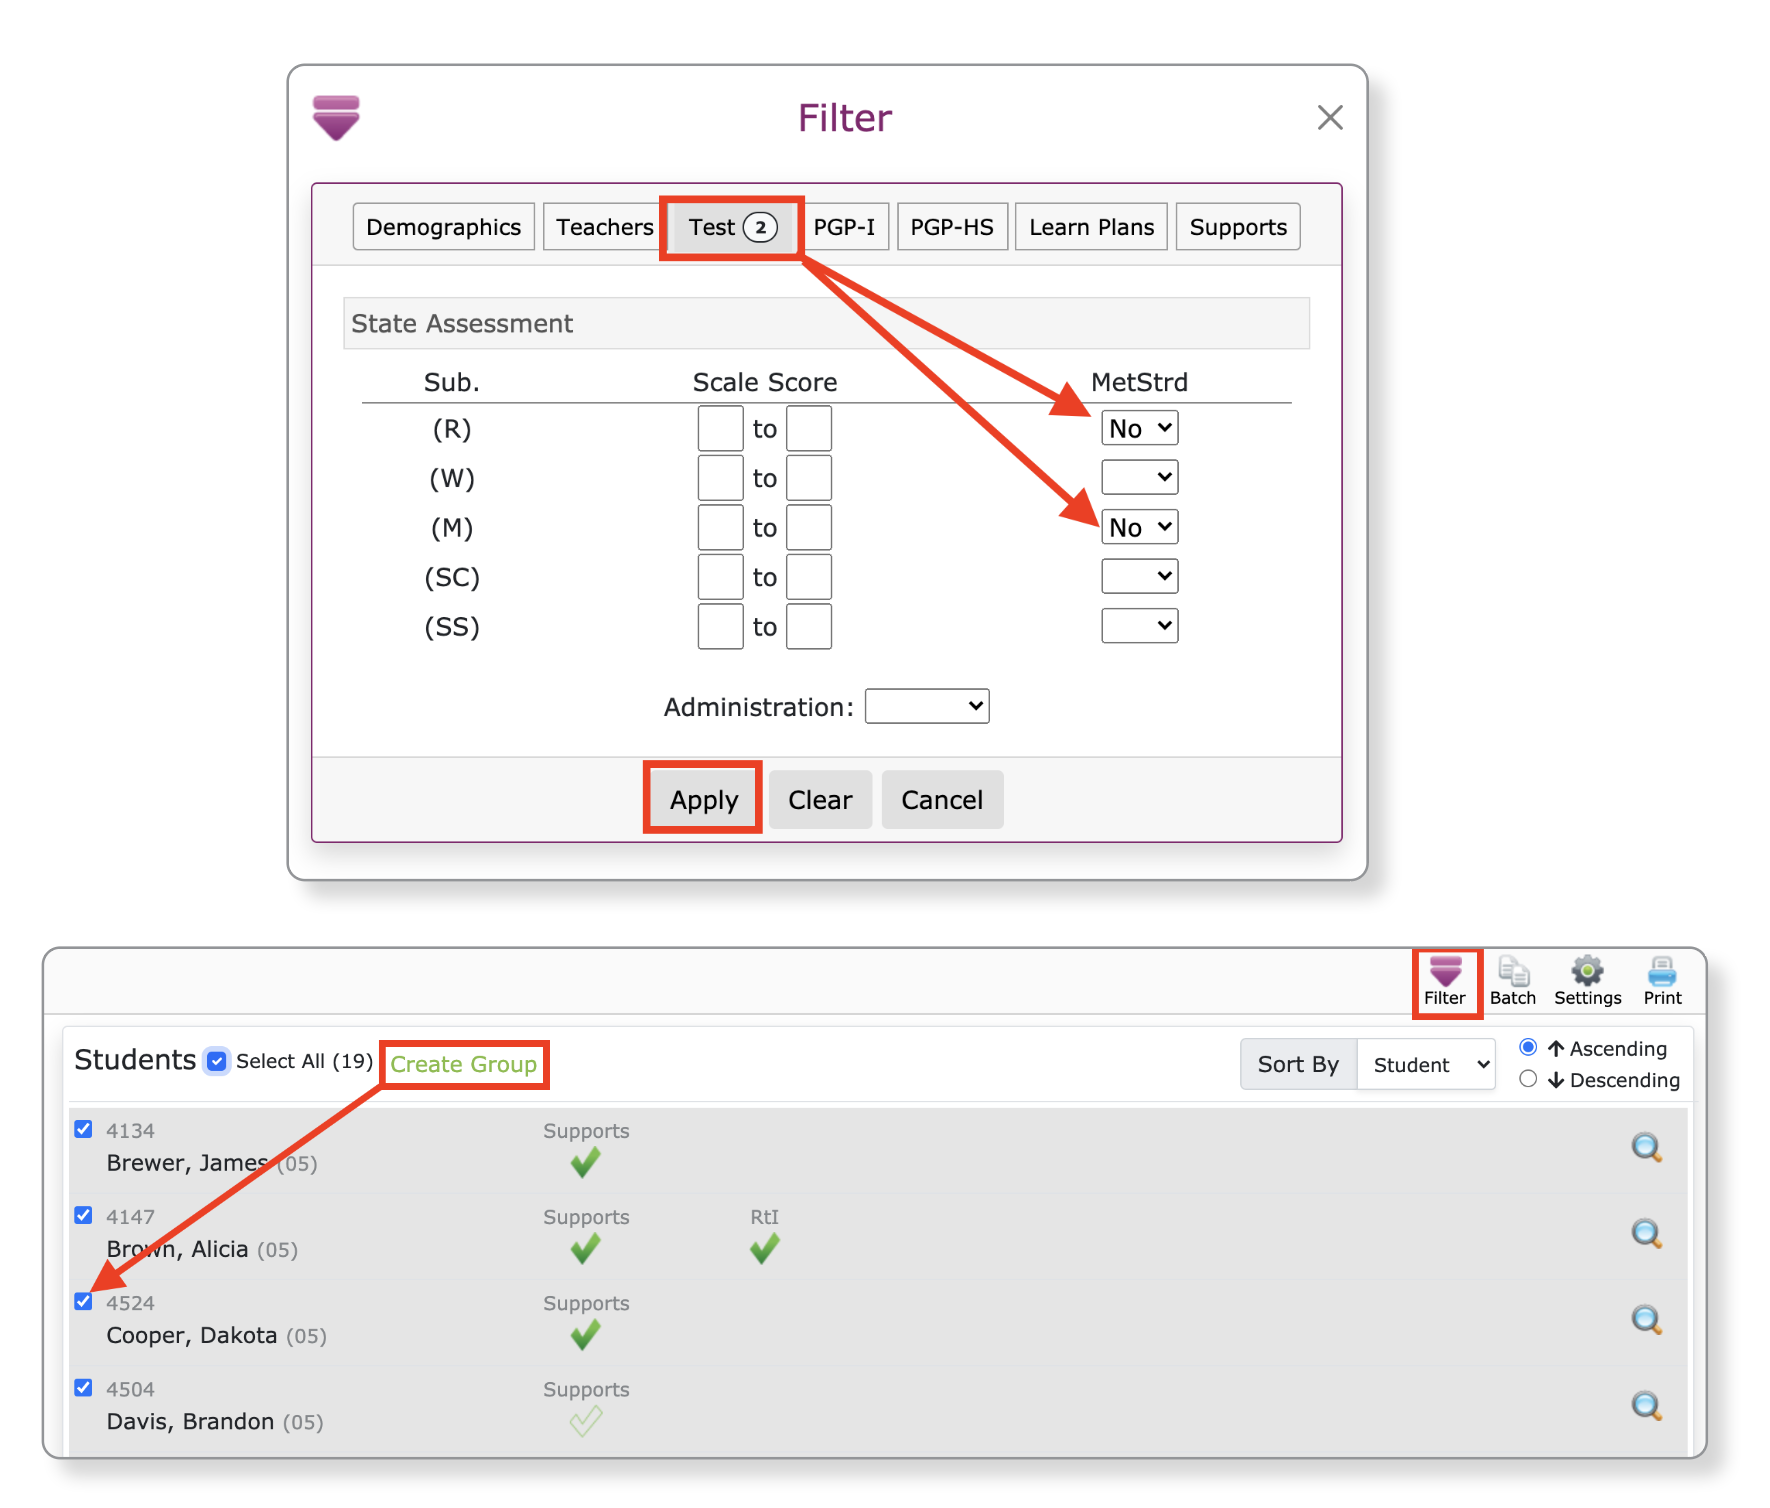
From Student Portfolio, use the Advanced Filter to identify a group of students. After selecting more than one student from your list, click the green Create Group link. A new tab in Utilities will appear where you can name your group.
Custom Forms for Student Documentation
Utilize the FormWorks application to create customized forms or notification letters to parents. If you link forms to Student Portfolio or Learning Plans, data can be attached to individual students and tracked over time.
To save time, we have included a few common templates provided by TEA that can be tailored to your school’s individual needs.
- Open FormWorks > Templates and click the ADD NEW icon on the top right.
- Click on Select a common template.
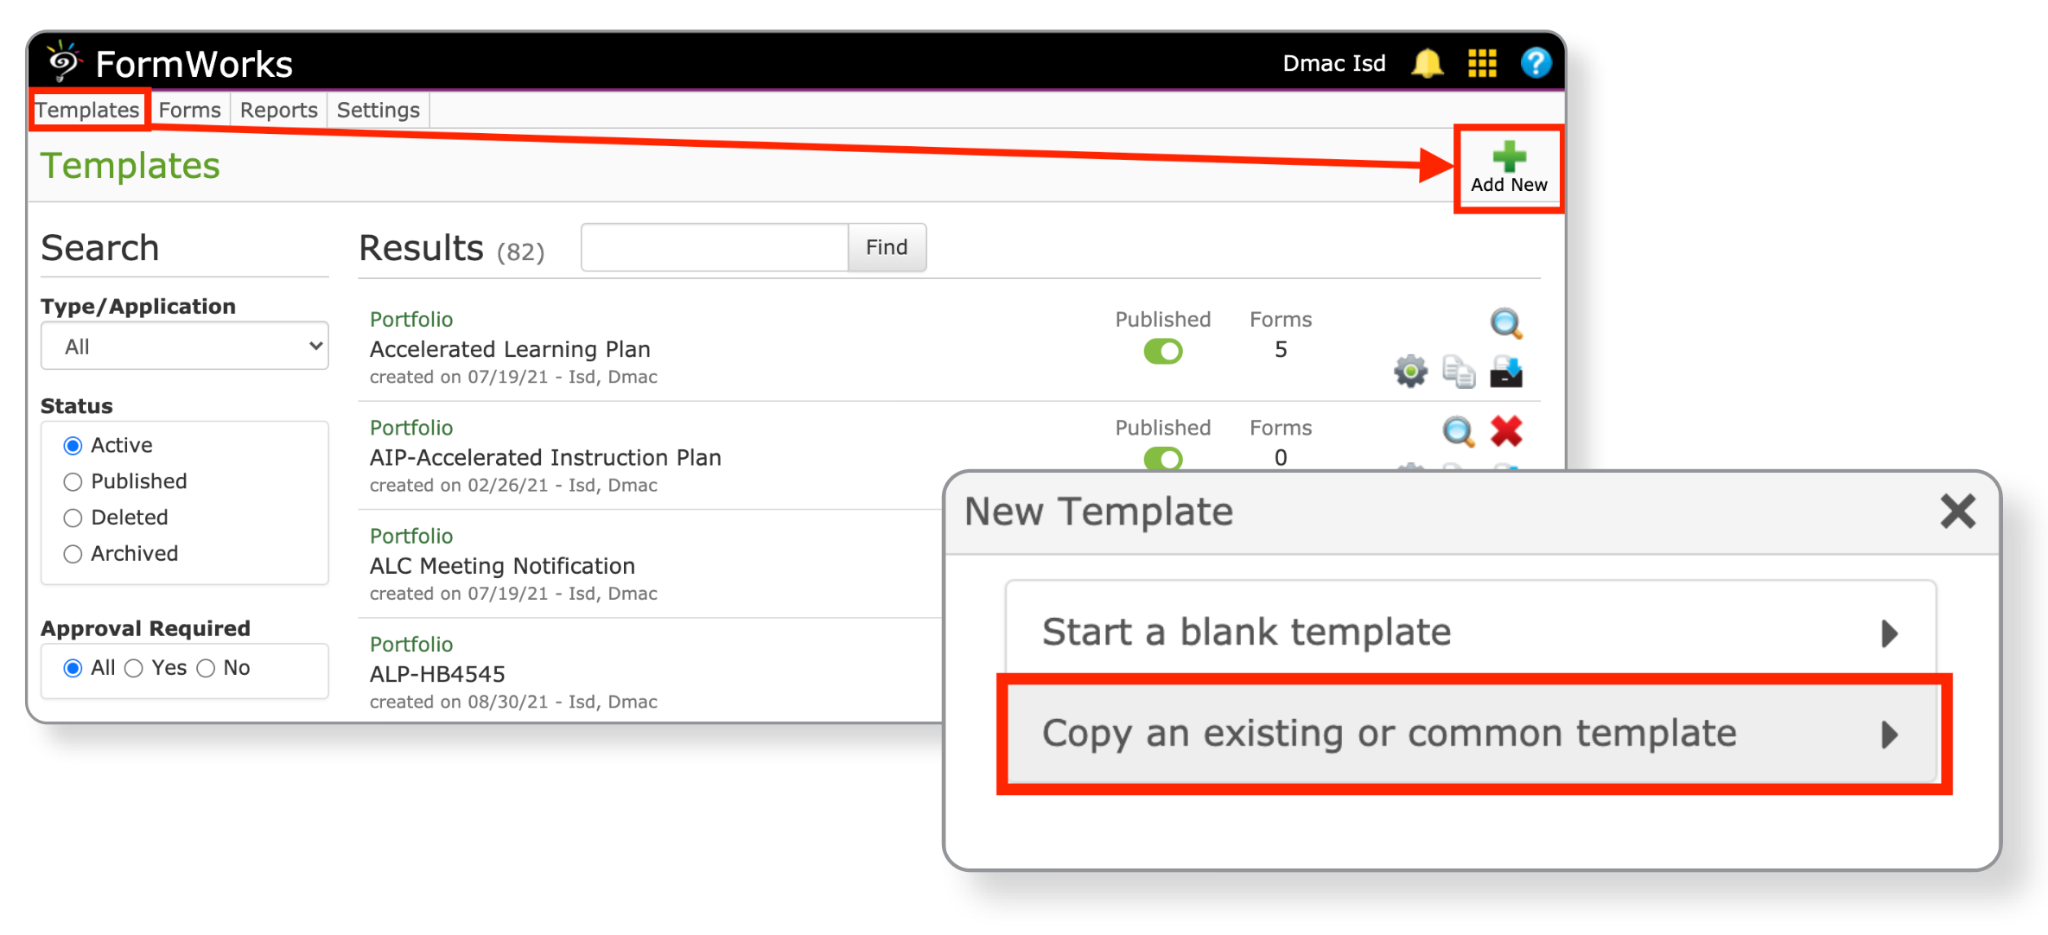
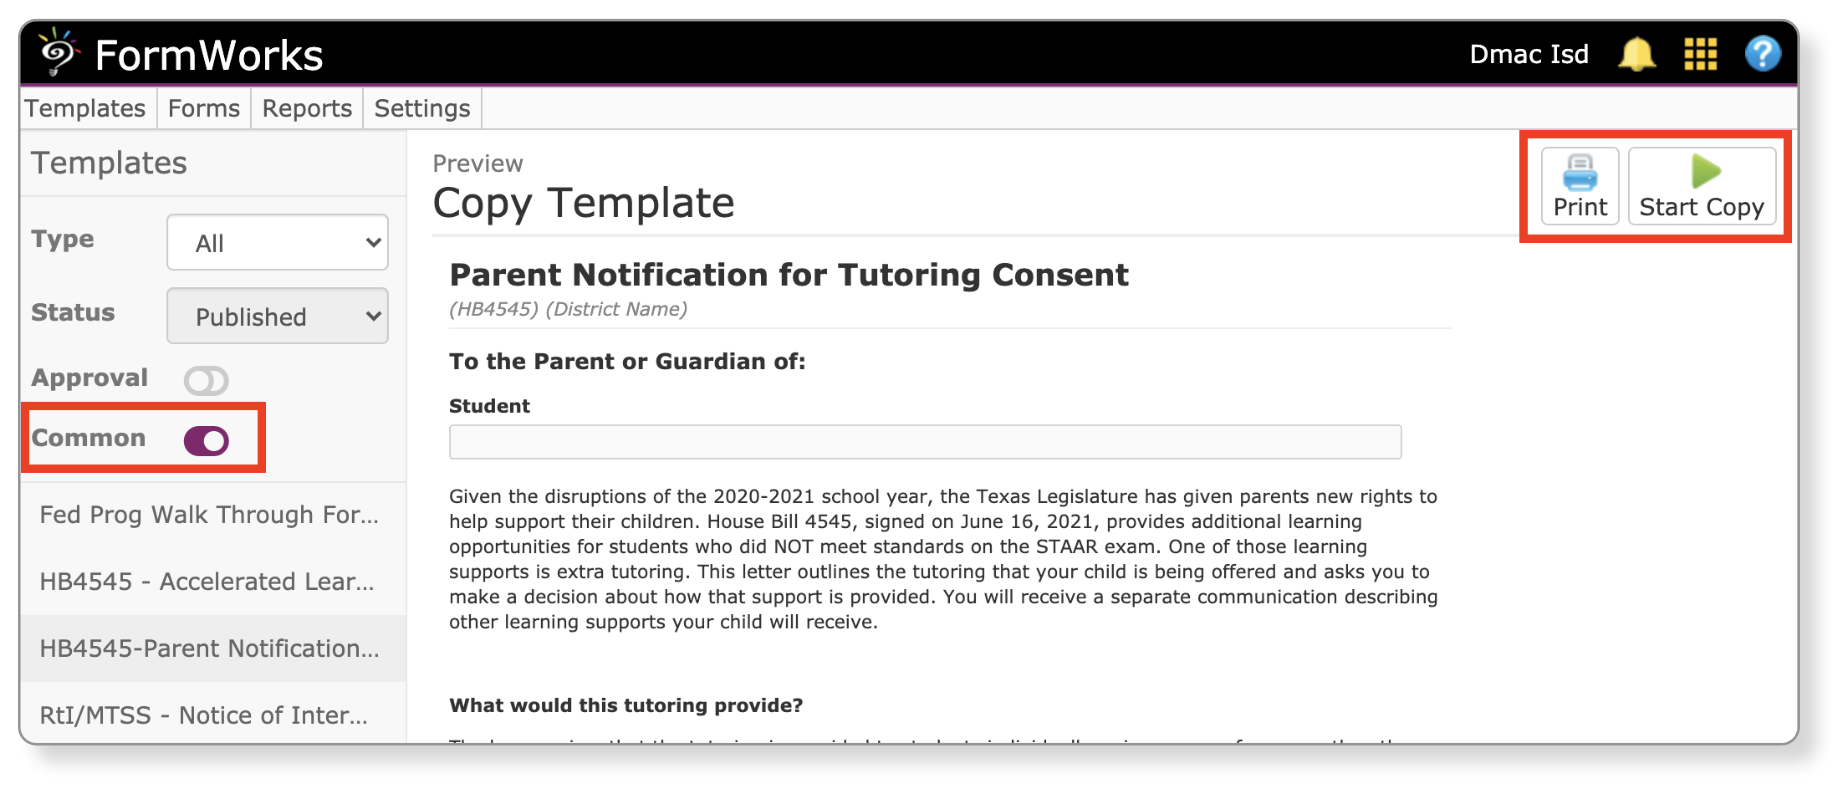
- Select the Common button (sample templates related to HB4545).
- Select a form from the left menu and then click Start Copy (top right).
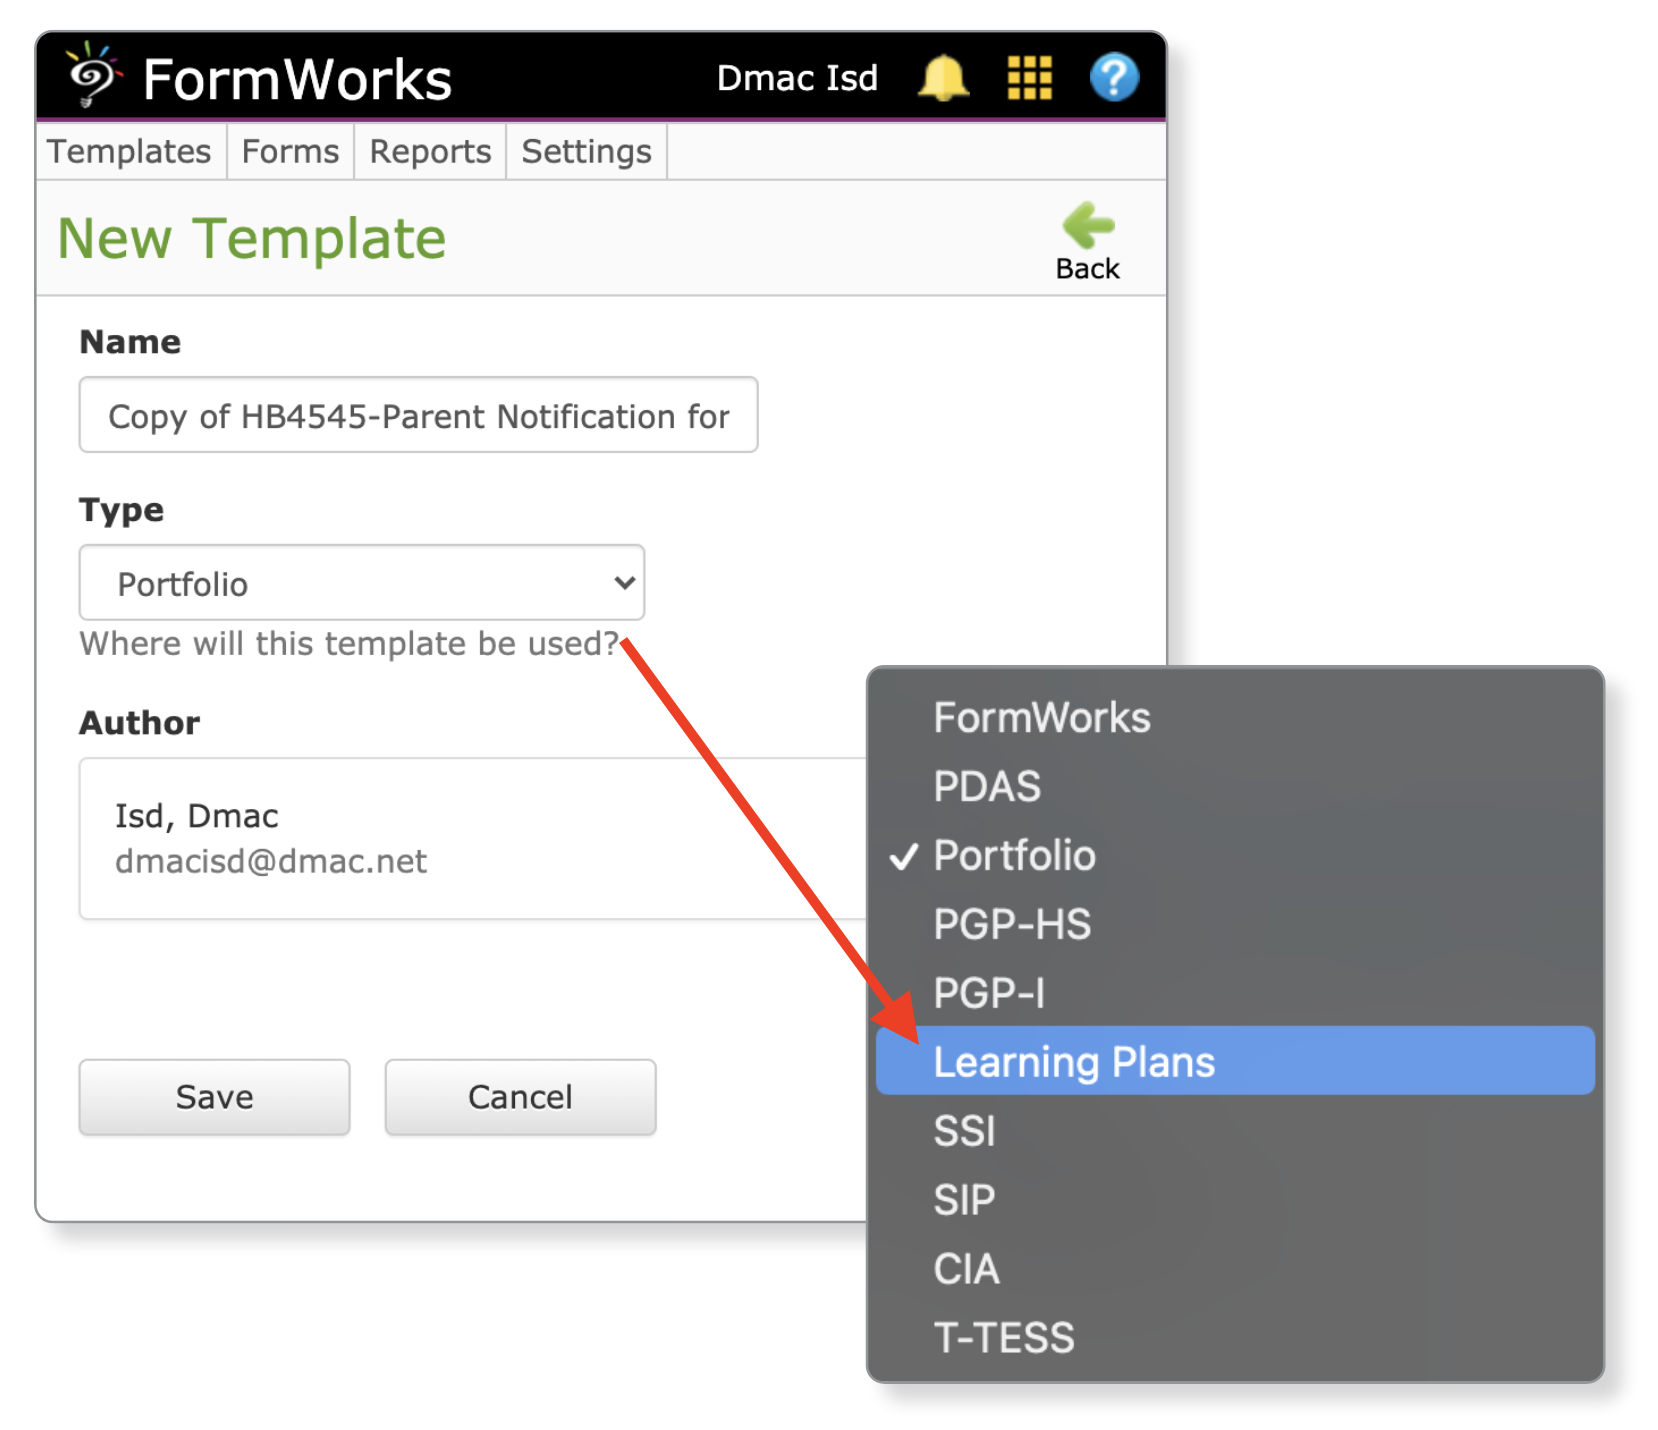
- Rename your template and select Portfolio or Learning Plans under the Type drop-down if you want to attache forms to individual student records in Student Portfolio. Click Save.
From this point, you can make changes to the form to fit your needs. Click the Settings icon next to each field to make changes or drag and drop new fields over from the left.
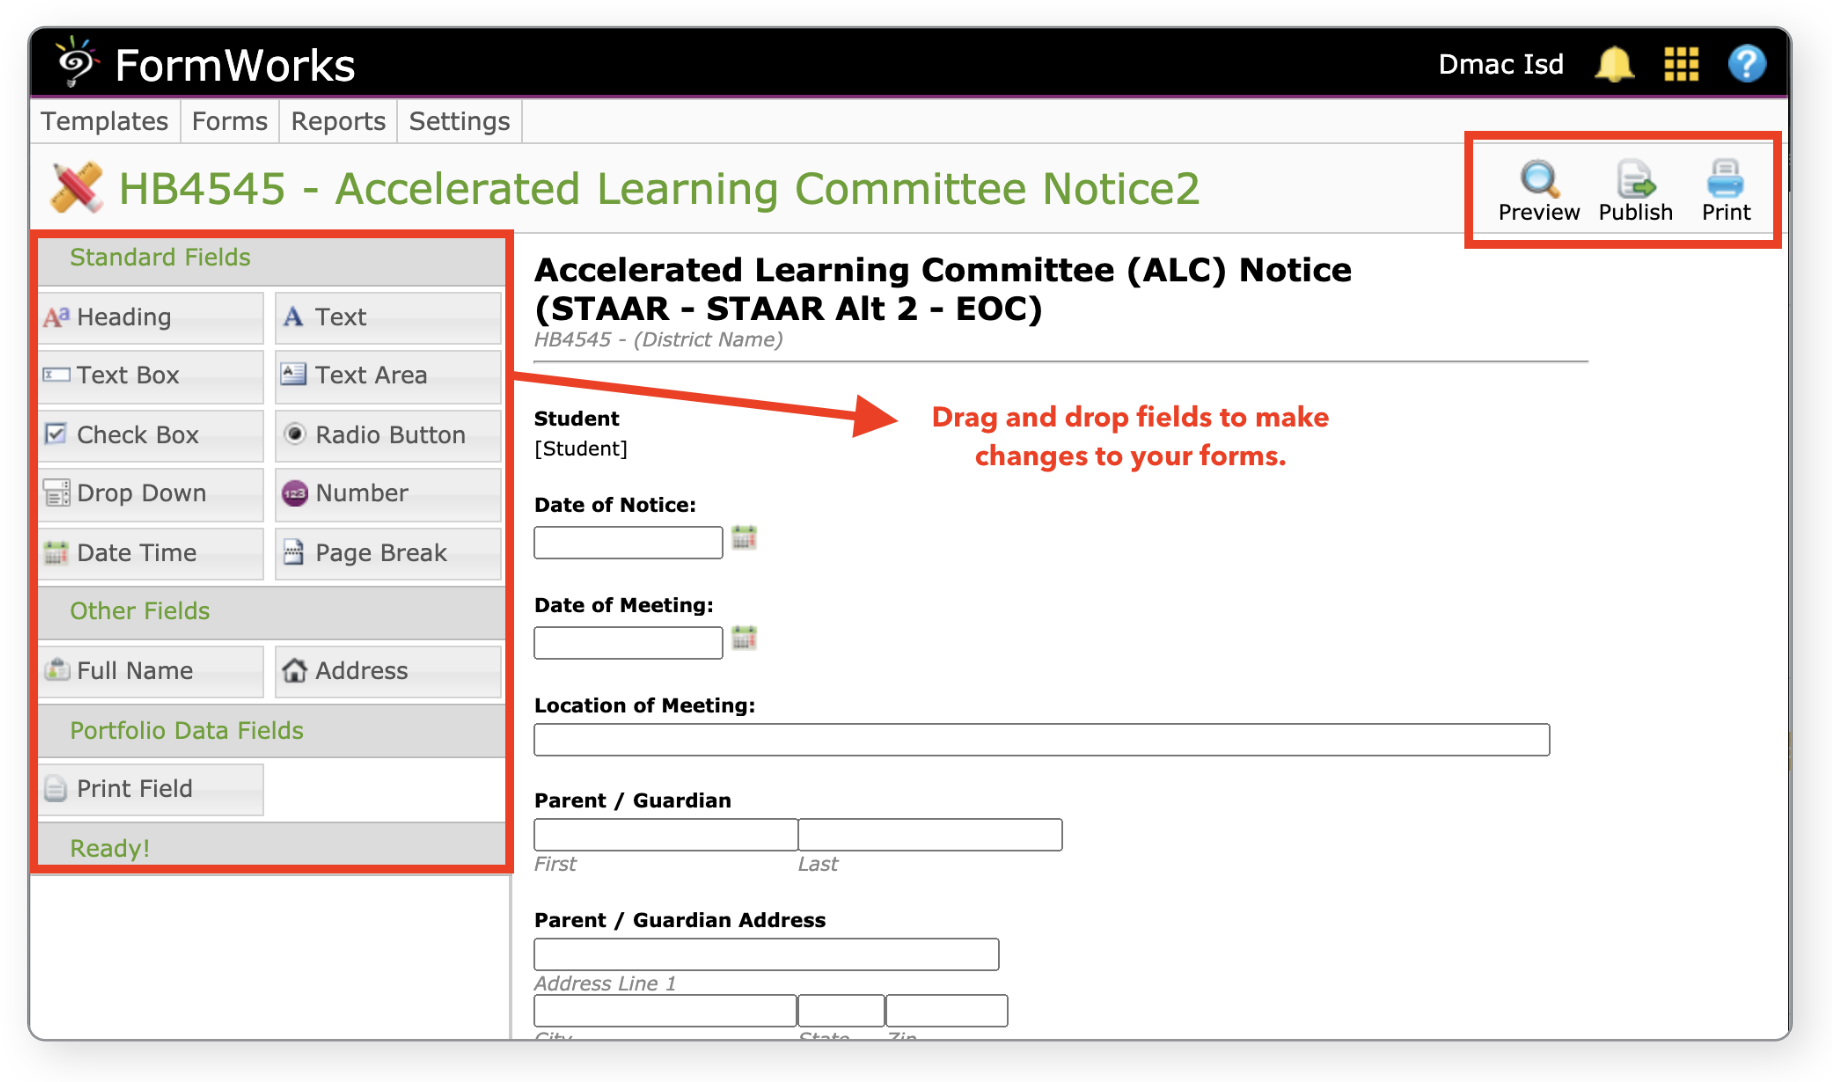
- Once you have finalized your form, click the Publish button.
- Note: Once published, all forms become Read-only. You can only make changes to a form if: 1) It’s unpublished; and, 2) another user has not completed the form. If needed, you can make a copy of a form that already has submissions.
To access your forms in Student Portfolio, open an individual student record and click the New icon on the Forms tab (located in the documentation panel on the left).
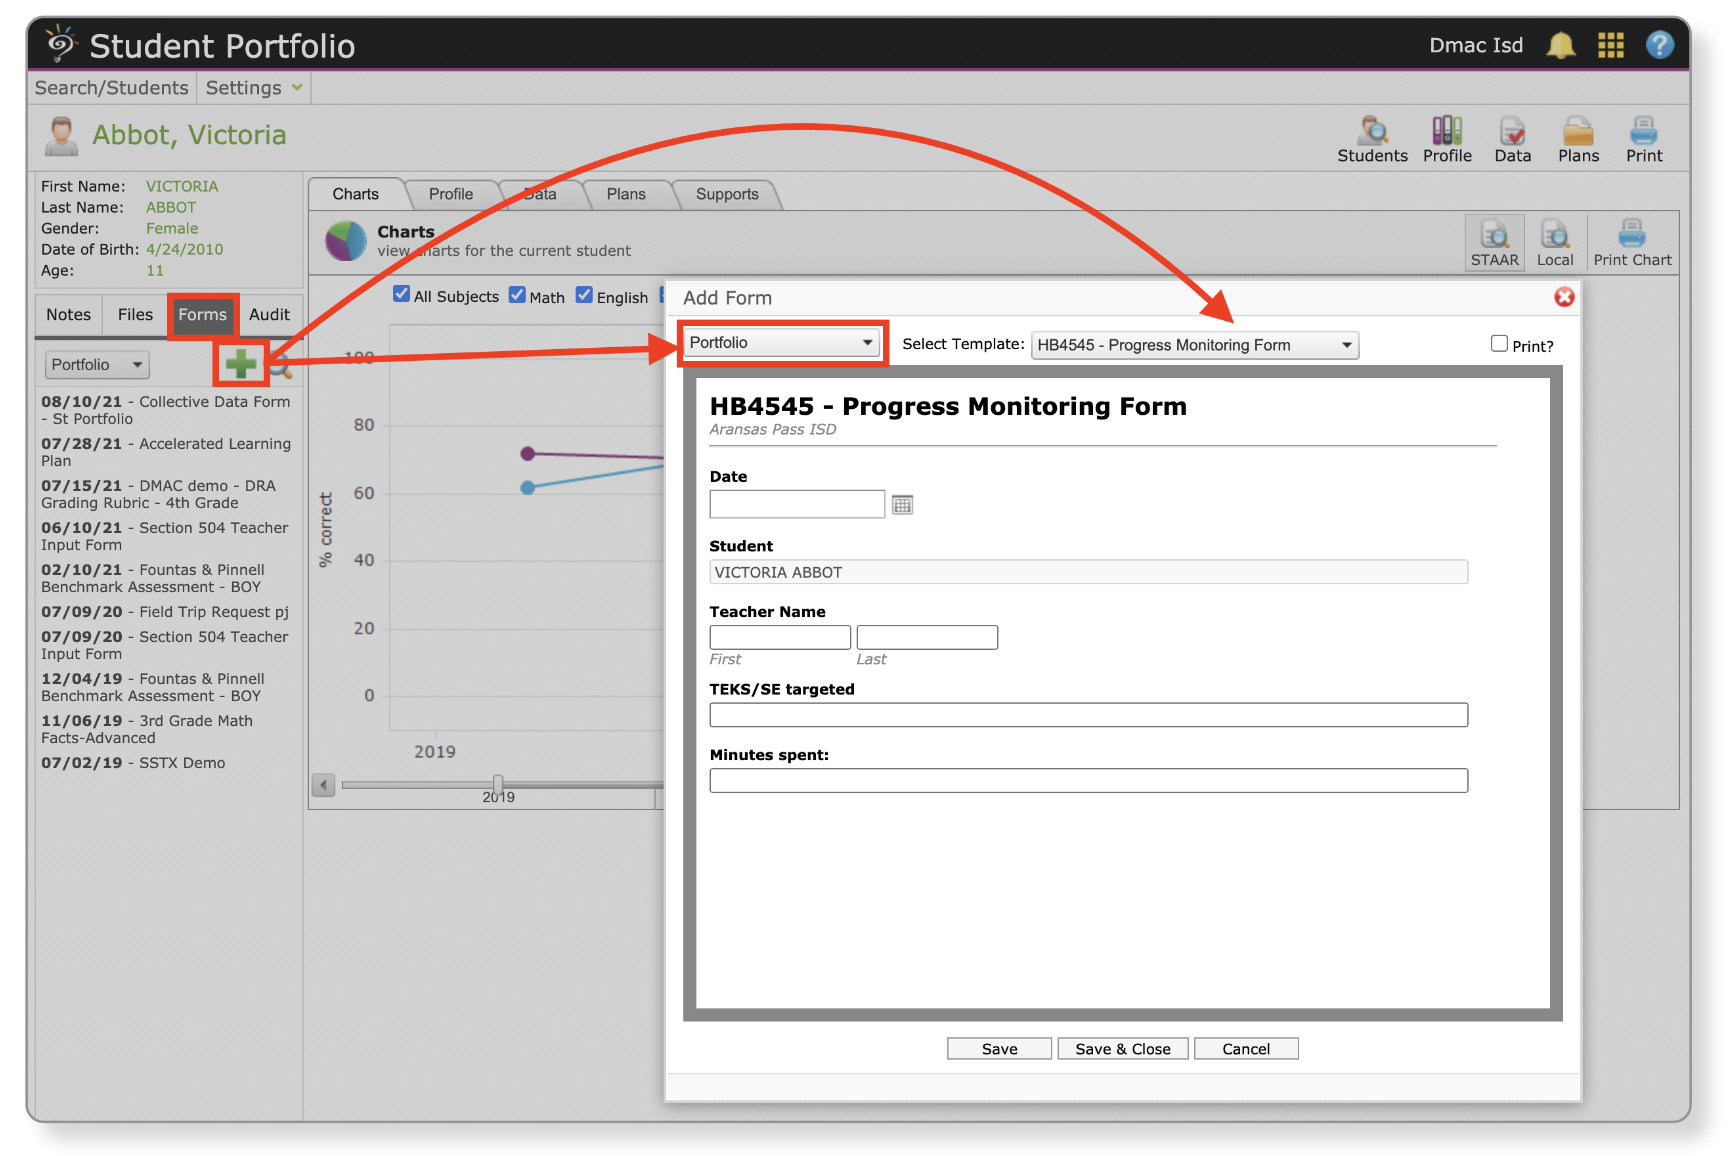
- Use the drop-downs to find forms attached to Portfolio or Learning Plans and then select your form.
- Select the magnifying glass icon from the Forms tab to Edit existing forms attached to a student.
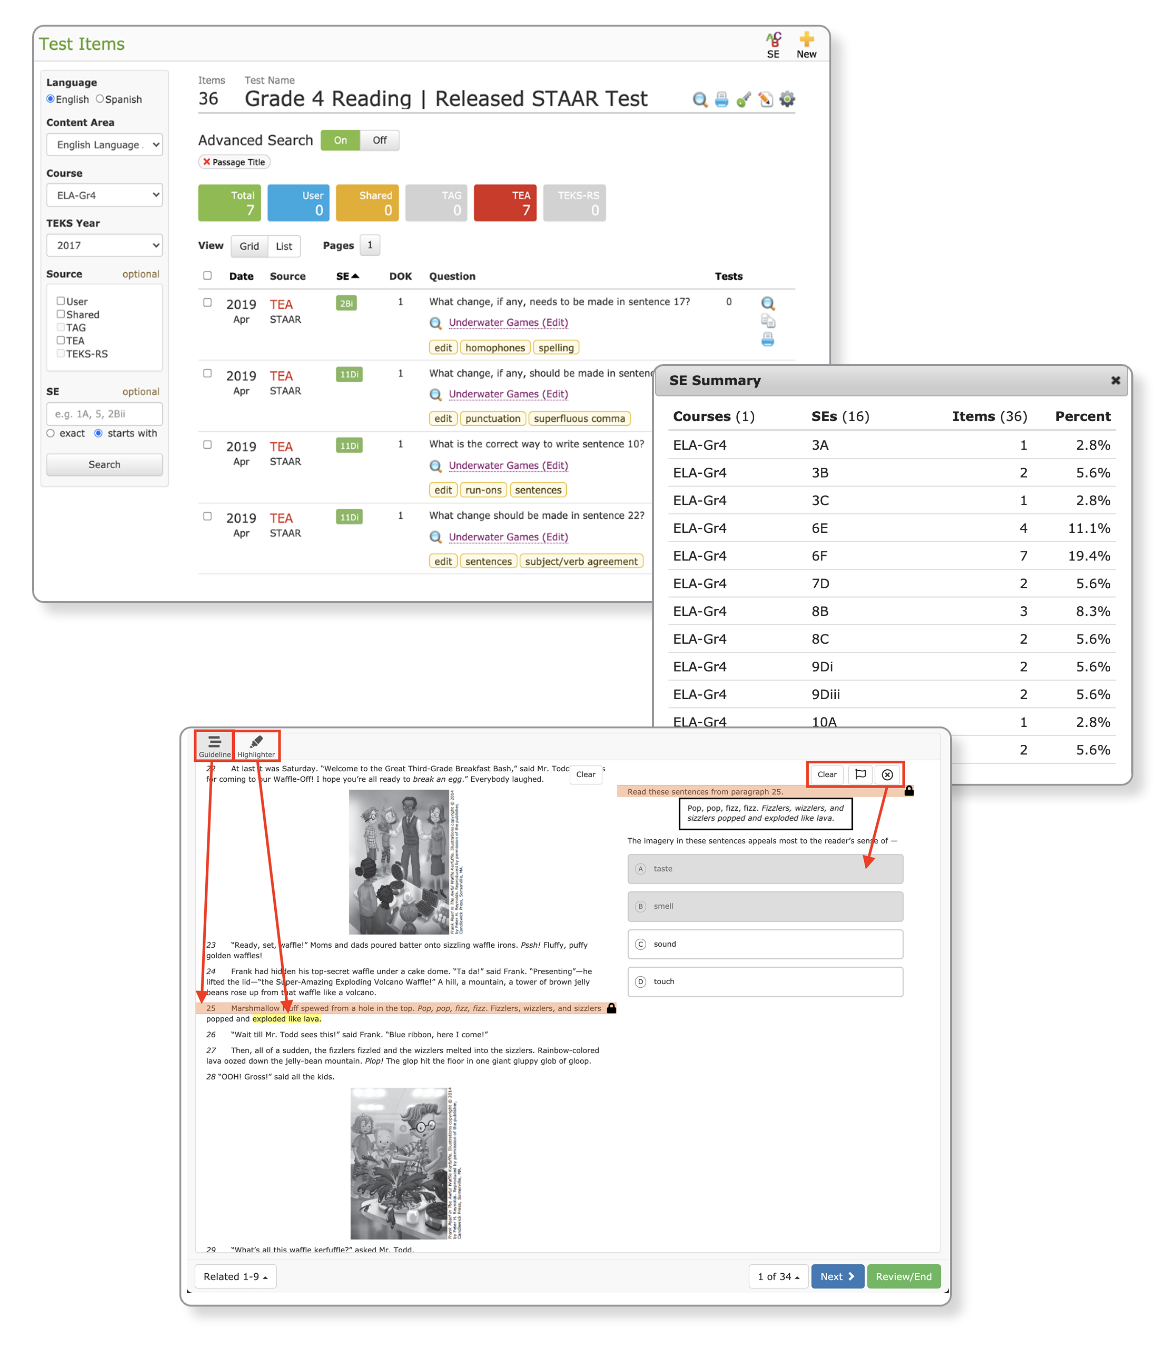
Create local assessments in TAG/TEKScore
Utilize the advanced filters to search for items tied to a specific SE, passage or genre. Click on the SE Summary to display a breakdown of test items.
Export tests from TAG to enable online tests in TEKScore and activate testing supports such as guidelines, highlighters, calculators and more. Enjoy real-time monitoring and reporting as students sign in and complete their tests.